• Skip to primary navigation
  • Skip to main content
  • Skip to primary sidebar
  • About Us
  • Contact Us
  • Affiliate Disclosure
  • Cookie Privacy Policy
  • Privacy Policy
  • Terms of Use
  • Sample Page

Essential Baby Products for New Parents

Essential Baby Products for New Parents | Your Guide to Parenthood

  • Home Page
  • Car seats

Car seats

How To Clean Mesa Car Seat

January 17, 2024 by WSwakil12 Leave a Comment

Keeping your car clean is essential for a pleasant driving experience. Whether dealing with a spilt drink, muddy shoes, or a pet-related mess, knowing how to clean your car’s seats is essential for maintaining a clean and comfortable car. In this guide, we’ll give you step-by-step instructions on how to clean and maintain your Mesa car seat so you can keep it in great condition. We’ll discuss the best materials and techniques to get the job done and what to avoid to prevent damage to your vehicle. Let’s get started!

Determine the Type of Car Seat You Are Cleaning

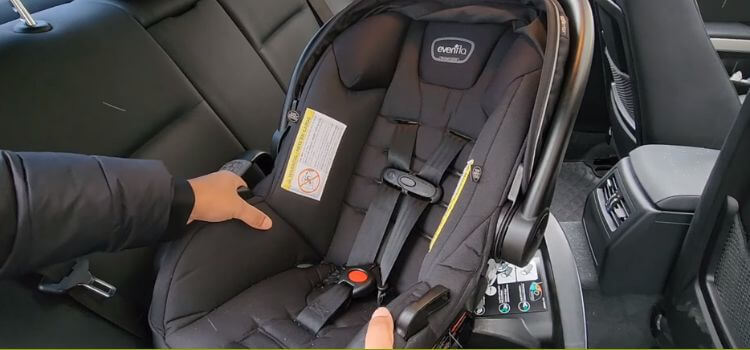
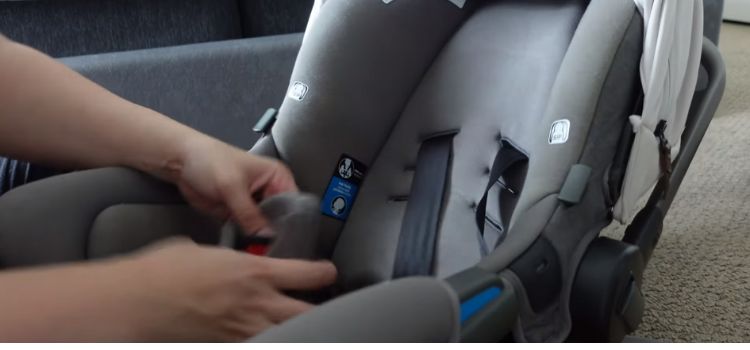
The first step to cleaning your Mesa car seat is to identify the type of car seat you are dealing with. This is important, as different car seat types require different cleaning methods. If you’re unsure what type of car seat you have, you can look for labels or tags near the back of the seat or check your car’s manual. Common types of car seats include leather, fabric, vinyl, and faux leather. Each type requires special cleaning and maintenance techniques to keep them looking their best. Once you’ve identified the type of car seat you have, you can move on to the cleaning process.

Vacuum the Car Seat

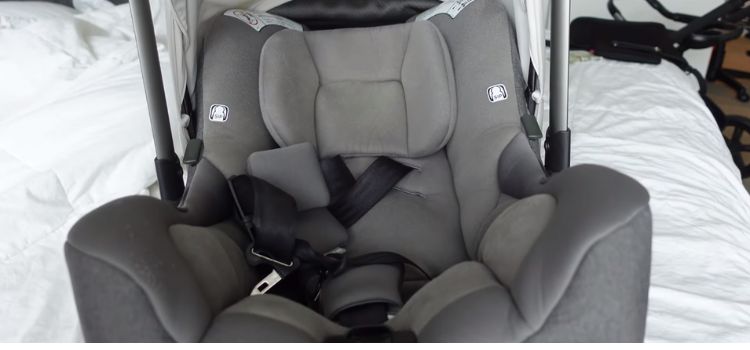
The next step in cleaning your Mesa car seat is to vacuum it. Vacuuming is essential in removing any dirt and debris that may have built up on the car seat. Start using the crevice tool on your vacuum cleaner to clean around the car seat’s seams, folds, and crevices. Use a vacuum designed for cars to avoid damaging the seat. After vacuuming, use the upholstery brush attachment to remove surface dirt and dust. Pay special attention to the areas of the car seat that are most likely to collect dirt, such as the headrest, armrests, and the seat back. Once you’ve finished vacuuming, you can move on to the next step in the cleaning process.

Apply a Cleaning Solution

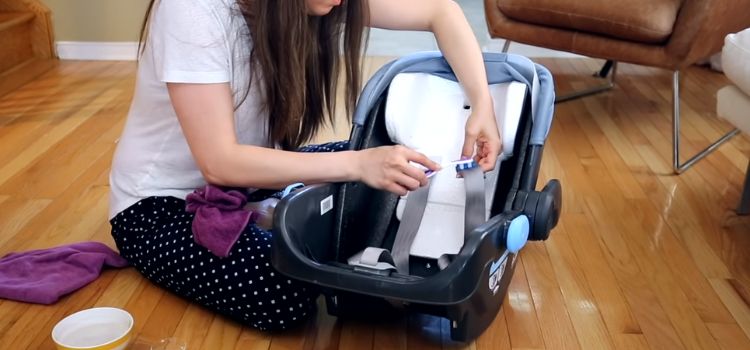
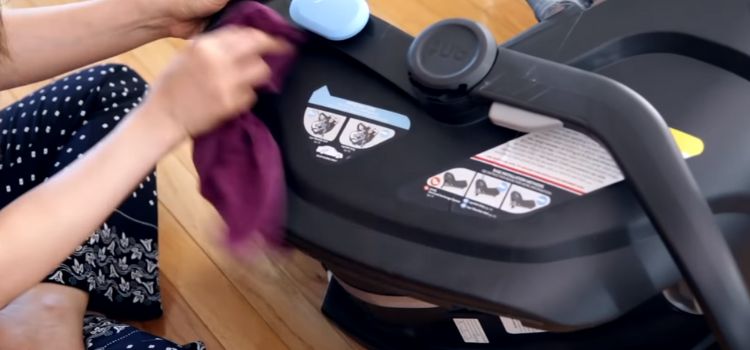
Once you have finished vacuuming, the next step in the cleaning process is to apply a cleaning solution to the car seat. Before applying any cleaning solution, read the directions and warning labels to ensure proper use. Certain types of cleaning solutions may contain harsh chemicals that can be damaging to the seat. In most cases, choosing a cleaning solution specifically designed for car seats is best. You should also test the cleaning solution in an inconspicuous area of the car seat before applying it to the entire seat. Once you have chosen a cleaning solution and tested it, spray it onto the car seat and gently scrub the surface with a dry cloth. Pay special attention to areas that are particularly dirty or stained. After scrubbing the car seat, use a damp cloth to wipe away any remaining dirt or cleaning solution. Finally, allow the car seat to air dry before using it again. Following these steps will ensure your car seat is kept in top condition and looks great for years.

Scrub the Car Seat

It is the key to keeping your car seat looking like new. It is important to be careful when cleaning the car seat as certain cleaning solutions may contain harsh chemicals that can damage the seat. Before using any cleaning solution, it is best to test it in an inconspicuous area to ensure it does not damage the seat or the material. Once you have chosen a cleaning solution, spray it onto the car seat and gently scrub the surface with a dry cloth. Make sure to pay special attention to any particularly dirty or stained areas. Once scrubbing the car seat, use a damp cloth to wipe away any remaining dirt or cleaning solution. Finally, allow the car seat to air dry before using it again. Following these steps will ensure your car seat is kept in top condition and looks great for years.

Rinse the Car Seat

It is an important step in maintaining the cleanliness and appeal of your car seat. By rinsing, you remove any dirt, dust, and debris that may have accumulated over time. You will need a bucket of clean, warm water and a cloth to do this. First, thoroughly dampen the cloth in the bucket and wipe down the car seat. Carefully get into any crevices or seams in the seat, as dirt will likely build up in those areas. Once you are done wiping the seat down, use the bucket of water to rinse the cloth and wipe the seat again. This will ensure that all dirt and debris are removed from the seat. When rinsing the car seat, allow it to air dry before using it again. Following these steps will help you to keep your car seat looking like new for years to come.

Dry the Car Seat

It is an important step in keeping your car seat looking new for as long as possible. When dealing with any fabric or leather, it is essential to thoroughly rinse the car seat before drying it to remove any dirt or debris that may have accumulated on the surface of the seat. You will need a bucket of clean, warm water and a cloth to do this. First, thoroughly dampen the cloth in the bucket and wipe down the car seat. Carefully get into any crevices or seams in the seat, as dirt will likely build up in those areas. Once you are done wiping the seat down, use the bucket of water to rinse the cloth and wipe the seat again. This will ensure that all dirt and debris are removed from the seat. When rinsing the car seat, allow it to air dry before using it again. Following these steps will help you keep your car seat looking like new for many years.

Apply a Fabric Protector

To your car seat to protect it from dirt, stains, and spills. Many fabric protectors are water-based, so they will not damage the upholstery or make it slippery. Before applying the fabric protector, thoroughly rinse the car seat with warm water and a cloth. This will remove any dirt or debris accumulated on the seat’s surface. After the seat is dry, spray the fabric protector onto the seat in an even layer. Allow the protector to dry completely before using the seat again. Doing this regularly will help keep the fabric and leather in your car looking new for many years. It is also important to note that if your car seat has any leather accents, you should use a leather protector instead of a fabric protector for optimal protection. Taking a few moments to apply a fabric protector to your car seat can make a huge difference in its appearance and longevity.

Conclusion

Cleaning your car seat can be a tedious task. However, it is important to keep your car seat clean to maintain the material’s quality and ensure your comfort. There are several ways to clean your car seat, such as using a vacuum cleaner, steam cleaner, or upholstery cleaner. Additionally, you can use a homemade cleaning solution, such as a mixture of baking soda and water, to remove stains and dirt. Taking the time to clean and maintain your car seat properly will help it last longer and keep you comfortable while driving.

Filed Under: Car seats

How To Clean Evenflo Car Seat

January 17, 2024 by WSwakil12 Leave a Comment

Keeping your car seat clean is essential to keeping your little one safe and healthy. It can be challenging to keep your car seat clean, especially when dealing with spills and messes regularly. That’s why knowing how to clean your Evenflo car seat safely and effectively is essential. In this post, we’ll review the best practices for cleaning your Evenflo car seat and provide tips to help you get the job done quickly and easily.

Cleaning

Your Evenflo car seat is essential to keeping your child safe and healthy. Ensuring the cleaning process is done correctly and safely is also important. The first step to cleaning your Evenflo car seat is to use a vacuum to remove any loose debris. Next, use a damp cloth to wipe the seat with mild soap and warm water. After the seat has been wiped down, use a dry cloth to dry the seat thoroughly.

Once the seat is completely dry, you can use a spot cleaner on tough stains. Be sure to use a cleaner designed specifically for car seats, as some cleaners may contain chemicals that can cause damage to the seat. Be sure to read the instructions carefully and use the cleaner as directed. After applying the spot cleaner, use a dry cloth to remove any excess cleaner.

Finally, allow the car seat to air dry before reinstalling. Make sure the seat is completely dry before putting your child back in. Following these steps will help ensure your Evenflo car seat is clean and safe for your child.

Gather the cleaning supplies

If you need to clean your Evenflo car seat, you will need a soft cloth or sponge, a spot cleaner, and a dry cloth. Make sure to use a cloth that is not abrasive to avoid causing damage to the fabric. Also, spot cleaners should be applied to a clean cloth and not directly onto the car seat. For best results, use a cleaner designed specifically for car seats.

Once the supplies are gathered, you can begin cleaning your Evenflo car seat. Use a soft cloth or sponge to wipe down the seat, ensuring you get into all the nooks and crannies. Pay particular attention to the edges and the headrest. Use a gentle circular motion to ensure that all the dirt and debris are removed.

Vacuum the surface

Of your Evenflo car seat to remove any dirt and debris. Make sure to use the appropriate attachments for the job. It would help to start with the crevices and corners and then move to the larger areas. Be gentle, as you don’t want to damage the fabric. You should also make sure to vacuum around the edges and the headrest.

Doing this will ensure you have removed all the dirt and debris from the surface. Once you have cleaned the surface, use a damp cloth with a mild soap to remove any remaining dirt and residue. Then, use a dry cloth to dry the fabric. Make sure to dry thoroughly to prevent any water-related damage. Finally, use a spot cleaner to remove any stubborn stains that remain. Go over the fabric twice, wiping with a dry cloth in between. Following these steps will help you keep your Evenflo car seat looking new.

Spot-clean the surface

To keep your Evenflo car seat looking its best. Vacuuming the fabric around the edges and headrest can help remove any dirt and debris that might have settled in the fabric. After vacuuming:
Use a damp cloth with a mild soap to remove any remaining dirt and residue.
Dry the fabric thoroughly with a dry cloth to prevent water-related damage.
Use a spot cleaner to remove any stubborn stains that remain.
Go over the fabric twice, wiping with a dry cloth in between.
Following these steps can help you maintain the look and feel of your Evenflo car seat. Furthermore, it’s essential to spot-clean the surface and not use harsh chemicals that could damage the fabric. With a regular cleaning routine, your car seat can look like new for longer.

Prepare a cleaning solution

By combining a mild soap and warm water. Mix the solution until the soap is fully dissolved. Please ensure the soap is gentle enough not to damage the car seat’s fabric. Once the cleaning solution is ready, wet a cloth with it and gently wipe away any dirt or residue from the car seat. It’s essential to use a light touch to prevent any damage to the fabric.

Once you’ve wiped away all the dirt, use a damp cloth to rinse off any soap residue. Then, use a clean, dry cloth to dry the fabric to prevent water-related damage. If any stains need more attention, use a spot cleaner to take care of them. It’s essential to only spot-clean the surface and never to use any harsh chemicals that could damage the fabric. With a regular cleaning routine, you can ensure that your car seat looks like new for longer.

Clean the surface

Use your car seat regularly to maintain its appearance and keep it looking new. Begin by preparing a cleaning solution, which can be created by mixing a few drops of mild liquid soap into a bucket of warm water. Please ensure the soap is gentle enough not to damage the car seat’s fabric.

Once the cleaning solution is ready, wet a cloth with it and gently wipe away any dirt or residue from the car seat. It’s essential to use a light touch to prevent any damage to the fabric. Once you’ve wiped away all the dirt, use a damp cloth to rinse off any soap residue.

Then, use a clean, dry cloth to dry the fabric to prevent water-related damage. If any stains need more attention, use a spot cleaner to take care of them. It’s essential to spot-clean the surface and never use harsh chemicals that could damage the fabric. With a regular cleaning routine, you can ensure that your car seat looks like new for longer.

Wipe down the surface

Of your car seat with a mild cleaning solution. When cleaning your car seat, using the right products and techniques is essential. Start by mixing a mild soap with some lukewarm water in a bowl. Please ensure the soap is gentle enough not to damage the car seat’s fabric.

Once the cleaning solution is ready, wet a cloth with it and gently wipe away any dirt or residue from the car seat. It’s essential to use a light touch to prevent any damage to the fabric. Once you’ve wiped away all the dirt, use a damp cloth to rinse off any soap residue.

Then, use a clean, dry cloth to dry the fabric to prevent water-related damage. If any stains need more attention, use a spot cleaner to take care of them. It’s essential to spot-clean the surface and never use harsh chemicals that could damage the fabric. With a regular cleaning routine, you can ensure that your car seat looks like new for longer.

Apply a protectant

After the fabric has been cleaned, it is dry and residue-free. Protectants help to keep dirt and debris from sticking to the fabric while also making the fabric more resistant to staining and UV damage. A few different types of protectants are available, so make sure you read the labels to ensure you’re using the right one for the task.

Generally, when using protectants, you should ensure the fabric is dry before applying it and use a soft cloth to spread it evenly. Pay careful attention to any seams or crevices so you don’t miss any spots. The type of protectant you use will also determine if you need to reapply it every month or year, so read the instructions thoroughly. Using a protectant, you can keep your car seat looking new for longer.

Let the car seat air-dry.

 Cleaning and applying the protectant will help the fabric completely dry and will also help ensure that the protectant is evenly distributed and has a chance to settle in. You should also avoid using any hair dryer, steam, or heat to dry the fabric, as this can cause damage to the fabric. To thoroughly dry the fabric, give the car seat and fabric an additional 24 hours of airing out time.

This will also help to reduce any odours caused by the cleaning and protectant application. After 24 hours, your car seat should be ready and look like new. With regular cleaning and a protectant, you can ensure your car seat looks new for a more extended period. Just remember always to let the fabric air dry and never use harsh chemicals or heat.

Conclusion 

Cleaning your Evenflo car seat is essential to keeping it in good condition. Regular cleaning will help keep your car seat looking and functioning like new and help ensure that your child is safe and comfortable when riding in it. Start by vacuuming the car seat to remove any dirt and debris. Then, spot-clean any additional messes with a damp cloth and mild soap. Remember to clean the straps and buckles, too. Finally, always ensure the car seat is completely dry before you use it again. These simple steps will help you keep your Evenflo car seat looking and functioning.

Filed Under: Car seats

How To Burp A Baby In A Car at Seat

January 17, 2024 by WSwakil12 Leave a Comment

Burping a baby in a car seat can be daunting for new parents, but it doesn’t have to be! In this post, we’ll discuss the best ways to burp a baby in a car seat and provide tips and tricks to help make the process easier. We’ll also discuss the importance of burping a baby, the signs that your baby needs to be burped, and how to tell if your baby has been successfully burped. These tips and tricks allow you to quickly and confidently burp your baby in the car seat.

Identify and Prepare the Necessary Items

Before burping your baby in the car seat, you must identify and prepare the necessary items. This includes a burp cloth or towel, a few pillows or toys to help prop up your baby, and a fresh bib. It’s also essential to make sure your baby’s diaper is clean and your hands are clean. You should also have a few baby wipes to clean up spills. Once you have all the necessary items, you can begin burping your baby in the car seat.

Secure Your Baby in the Car Seat

Once you’ve identified and prepared the necessary items, you’ll want to secure your baby in the car seat. Place your baby in the car seat and ensure their head and neck are properly supported. Position the shoulder straps to sit at or below your baby’s shoulder level. If you have a newborn, ensure the straps are positioned so they won’t cover their mouth or nose.

Ensure the chest clip is at the level of your baby’s armpits and snug but not too tight. Ensure the car seat is secured tightly to the vehicle and all straps are tightened correctly. If the car seat is loose, it can increase the risk of injury in a crash. Once your baby is secured in the car seat, you can begin burping them.

Position the Baby Correctly

When positioning your baby in the car seat, there are some key things to remember. First, make sure their head and neck are properly supported. Position the shoulder straps to sit at or below your baby’s shoulder level. If you have a newborn, ensure the straps are positioned so they won’t cover their mouth or nose. Additionally, ensure the chest clip is at the level of your baby’s armpits and snug but not too tight. This will help keep your baby secured correctly in the car seat.

Once your baby is positioned correctly, the next step is to secure the car seat in the vehicle. Ensure the car seat is attached tightly to the vehicle and all straps are tightened correctly. If the car seat is loose, it can increase the risk of injury in a crash. Ensure your baby is safe and secure before you begin burping them. This is a crucial step to ensure your baby’s safety when travelling in a car.

Place Your Hand on the Baby’s Back

It is one of the most important steps to ensure your baby’s safety in a car seat. To do this, carefully place your hand on the baby’s back with your fingers spread and your palm flat. This will help ensure that your baby is appropriately positioned in the car seat, that the straps are tightened correctly, and not covering their mouth or nose.

Additionally, ensure the chest clip is snug but not too tight and positioned at your baby’s armpits. Once you have done this, fasten the car seat into the vehicle. Ensure the car seat is secured tightly to the vehicle and all straps are tightened correctly. If the car seat is not fastened properly, it increases the risk of injury in a crash. Therefore, ensure your baby is secure and safe before burping them. Place Your Hand on the Baby’s Back is an important step you should take when you put your baby in the car seat to ensure their safety.

Rub the Baby’s Back in a Circular Motion

It is a great way to help your baby relax and prepare for burping. You can begin this process by carefully placing your hand on the baby’s back with your fingers spread and your palm flat. Ensure the chest clip is snug but not too tight and positioned at your baby’s armpits.

Once you have done this, fasten the car seat into the vehicle and make sure all straps are tightened properly. After you have secured the car seat, you can start rubbing your baby’s back in a circular motion. Please start at the shoulder blades and move your hands circularly towards their stomach and back up. You can also do this for a few minutes to help your baby relax and prepare for burping. Keep your hand movements gentle and slow.

This will help your baby feel comforted and relaxed. Rubbing the Baby’s Back in a Circular Motion is an easy and effective way to prepare your baby for burping and help them feel more comfortable and secure.

Monitor the Baby’s Response

When you are burping your baby, it is essential to monitor their response. Look for signs such as fidgeting, crying or fussing, as these can indicate they need to be burped. If you notice these signs, it may be time to take a break and position your baby over your shoulder.

After a few minutes of burping, if your baby is still fidgeting or fussing, you may need to take a break and move on to something else. You can always come back and try again later. In addition to monitoring their response, watch out for signs of discomfort. If your baby is gulping air or arching their back, they may need a break and be repositioned. Knowing the signs of pain can help you prevent problems and ensure your baby is comfortable.

Overall, monitoring the baby’s response is an integral part of burping. Awareness of their signs will help you take the best care of your baby and ensure they are happy and comfortable.

Change the Position or Move the Baby

Parents should be aware of the signs that their baby may be uncomfortable when burping. A common sign of discomfort is a baby who is fidgeting or fussing. In this situation, parents should take a break and reposition the baby. Another way to ensure your baby is comfortable is to monitor their response to being burped. If they are gulping air or arching their back, it could be a sign that they must be repositioned.
Parents need to be aware of discomfort when burping their baby. If you notice these signs, take a break and reposition or move your baby. You can also try several positions to find the best one for your baby. It is also essential to monitor your baby’s response to burping; if you notice signs of discomfort, take a break and move your baby. Knowing the signs of pain can help you provide the best care for your baby and ensure they are happy and comfortable.

Repeat the Process as Necessary

It is an important phrase to remember when burping your baby. The burping process may not be successful immediately, so taking a break and repositioning your baby is essential. This ensures that your baby is comfortable and that they are not gulping air or arching their back in discomfort. When you move your baby, try a few positions to find the best one.

Once you find the correct position, hold your baby and pat them gently on the back until they burp. If your baby is still uncomfortable, take another break and reposition them. Monitor your baby’s response to being burped and take a break if necessary. Repeating the process as necessary will ensure that your baby is comfortable and that you provide the best care for them.

Conclusion

Burping your baby in a car seat is not only possible, but it can be done with the proper technique. Make sure to secure the baby in the car seat and ensure that the straps are tight. Gently rock the baby from side to side and use a patting motion on the back to help the baby burp. If the baby does not burp, try changing positions, such as placing the baby on your lap and supporting their neck and back. Remember that it may take a few tries before the baby finally burps.

Filed Under: Car seats

Best Way To Clean Perforated Leather Car Seats

January 17, 2024 by WSwakil12 Leave a Comment

Leather car seats are an investment and must be appropriately cared for to keep them looking their best. Perforated leather seats, in particular, require special attention. With the proper knowledge, cleaning them can be easier and more convenient. Fortunately, there are simple and effective ways to keep your perforated leather car seats looking like new. In this post, we’ll discuss the best way to clean perforated leather car seats, including the right products and steps to take to achieve the best results.

Vacuum the Seats

The first step in cleaning perforated leather car seats is to remove any dirt or debris from the surface. We recommend using a handheld vacuum with an upholstery attachment to do this. Use a gentle suction as you vacuum to avoid damaging the leather. You can move to the other steps once the seats are free of dirt and debris. Pay special attention to crevices or seams where dirt and debris accumulate. Vacuum the seats thoroughly before you proceed with the next step.

Pre-treat Stains

Before you start cleaning perforated leather car seats, it is essential to pre-treat any stains that may be present. To do this:
Use a leather cleaner that is specifically designed for use on car seats.
Apply the cleaner directly to the stain and gently rub it with a soft cloth.
Allow the cleaner to sit for a few minutes before wiping it away with a damp cloth.
You may need to use an abrasive cleaner such as baking soda for more stubborn stains. If you use an abrasive cleaner, test it on a hidden leather area first to ensure it won’t damage the surface. Once the stains have been pre-treated, you can move on to cleaning the entire car seat surface.

Prepare a Cleaner Solution

Preparing a cleaning solution is the next step in cleaning perforated leather seats. You can make your cleaner using natural ingredients or purchase a commercial cleaner specifically designed for use on leather. Use distilled water and a mild dish detergent to make your cleaner. Mix the detergent and water in a bucket according to the instructions.

Once you have created the cleaner, you can scrub the car seat. To do this, use a soft cloth or brush to apply the cleaner to the surface of the car seat. Gently scrub the leather to remove dirt and grime, then rinse the seat with clean water. After the seat is clean, you can use a leather conditioner to restore the leather’s natural oils and protect it from damage.

Clean the Seats

Thoroughly with a cleaner. To do this, you should first prepare a cleaner solution. You can make your cleaner using natural ingredients such as distilled water and a mild dish detergent. Alternatively, you can purchase a commercial cleaner specifically designed for use on leather. When preparing your cleaner, follow the instructions included with the detergent.

Once the cleaner is ready, you can apply a soft cloth or brush to the car seat. Gently scrub the leather to remove dirt and grime, then rinse the seat thoroughly with clean water. Once the seat is clean, you can use a leather conditioner to restore the leather’s natural oils and help protect it from future damage. After the conditioner is applied, you can use a soft cloth to wipe away any excess product and buff the leather. This will help to provide a polished look and a long-lasting shine.

Finally, it would help to always store your car seat in a cool, dry place, such as the garage or carport, as this will help keep the seat in good condition for longer.

Rinse the Seats

To maintain the clean look and condition of your car. After cleaning the seats with a commercial cleaner:
Use a soft cloth or brush to scrub and remove dirt and grime.
Rinse the seat thoroughly with clean water to remove any cleaner residue.
Once the seat is clean, use a leather conditioner to restore the leather’s natural oils and help protect it from future damage.
Buff the leather with a soft cloth to provide a polished look and a long-lasting shine.
Store the car seat in a cool, dry place to help keep it in good condition for longer. This will ensure that the seat is always clean and well-maintained.
Following these steps will help keep your car seats looking pristine and last a long time.

Condition the Seats

Ensure that your car seats stay in good condition for a long time. Clean the seats with a commercial cleaner to remove dirt and grime. Use a soft cloth or brush to scrub and remove dirt and grime. Rinse the seat thoroughly with clean water to remove any cleaner residue.

Once the seat is clean, use a leather conditioner to restore the leather’s natural oils and help protect it from future damage. Buff the leather with a soft cloth to provide a polished look and a long-lasting shine. After conditioning, you should store the car seat in a cool, dry place like the garage or carport. This will help prevent the leather from cracking or fading in the sun.

Additionally, you should avoid placing the seat in direct sunlight, which may cause the leather to dry out and crack. By following these steps, you can ensure that your car seat looks pristine and lasts long.

Allow the Seats to Dry

And Protect from Sun Damage. Keeping your car seats clean is essential to maintaining its value for years. To keep your seats looking their best, you must take the time to clean and condition them correctly. Use a soft cloth or brush to scrub and remove dirt and grime. Rinse the seat thoroughly with clean water to remove any cleaner residue.

Once the seat is clean, use a leather conditioner to restore the leather’s natural oils and help protect it from future damage. Buff the leather with a soft cloth to provide a polished look and a long-lasting shine. After conditioning, you should store the car seat in a cool, dry place like the garage or carport. This will help prevent the leather from cracking or fading in the sun.

Additionally, you should avoid placing the seat in direct sunlight, which may cause the leather to dry out and crack. If your car seat is exposed to direct sunlight, use a UV protectant to protect the leather from fading and discolouring. Furthermore, regularly clean and condition your seat to preserve its appearance and quality. By following these steps, you can ensure that your car seat looks pristine and lasts long.

Conclusion

Cleaning perforated leather car seats can be a difficult task. It’s important to be gentle and use the right cleaning products to avoid damaging the leather. Regularly cleaning your car seats can help preserve their look and extend their life. Use a leather cleaner and conditioner to keep your seats looking new. Test any cleaning products on an inconspicuous area before using them on your car seats. Following these steps can help keep your car seats looking great for years.

Filed Under: Car seats

How To Adjust Straps On Evenflo 4 in-1 Car Seat

January 16, 2024 by WSwakil12 Leave a Comment

Installing a car seat correctly is essential for your child’s safety, and it can be an intimidating task for many parents. Understanding the specific instructions for each car seat you use is critical. This post will review how to adjust the Evenflo 4-in-1 car seat straps. We’ll discuss how to change the straps properly, position the car seat, and always use the correct installation method. With the proper knowledge and practice, you can ensure your child is as safe as possible in the car.

Read the Manual

Before you use the Evenflo 4-in-1 car seat, the manufacturer’s printed instructions are the most complete and accurate source of information. Not all car seats are the same, and the instructions will indicate how to adjust the straps, properly position the car seat, properly install it, and tips to remember when using the car seat.

Following the instructions is the key to ensuring the car seat is used correctly and safely.
Adjust the straps in the car seat. The straps should be snug and not loose. Ensure the straps are not twisted and the chest clip is centered correctly over the child’s chest.
Position the car seat according to the instructions. Ensure the car seat is level and straight and the harness straps are at or above the child’s shoulders.

Always use the correct installation method when using the Evenflo 4-in-1 car seat. The safest installation methods are either with the seatbelt or the LATCH system.
Following the instructions and using the correct installation methods are essential for your child’s safety. Reading the manual and educating yourself about car seats can help keep your child safe and secure.

Secure the Car Seat to the Vehicle

It is an important step for ensuring the safety of your child. It is essential to ensure the straps are tight and secure and that the chest clip is centered correctly over the child’s chest. The car seat should be level and straight, and the harness straps should be at or slightly above the child’s shoulders while in the car.

Following the manufacturer’s instructions is essential when installing the Evenflo 4-in-1 car seat. It is important to remember that there are two ways to install a car seat. The safest installation method is either with the seatbelt or the LATCH system. Reading the manual and educating yourself on the proper installation is essential for your child’s safety. Ensuring the car seat is secured correctly can save your child’s life in an accident.

Adjust the Harness System

It is essential to ensure your child is comfortable in the car seat. Start by ensuring the headrest is at the correct height for your child’s age and weight. Next, you will want to adjust the harness straps. Ensure the harness straps are at or slightly above the shoulder level for your child and that the chest clip is centered over the chest.

Ensure the harness straps are snug against the child’s body for a secure fit. Finally, read the instructions and double-check the harness adjustment settings. It is important to remember that adjustments must be completed while the child is in the seat. Adjusting the harness system properly will ensure your child’s safety and comfort in the Evenflo 4-in-1 car seat.

Adjust the Straps

It is essential to ensure your child is comfortable in the car seat. Start by ensuring the headrest is at the correct height for your child’s age and weight. Next, you will want to adjust the harness straps. Ensure the harness straps are at or slightly above the shoulder level for your child and that the chest clip is centered over the chest. Ensure the harness straps are snug against the child’s body for a secure fit.

Additionally, ensure the straps are not twisted and are evenly placed on each child’s side. Finally, read the instructions and double-check the harness adjustment settings. It is important to remember that adjustments must be completed while the child is in the seat. Adjusting the harness system properly will ensure your child’s safety and comfort in the Evenflo 4-in-1 car seat. By following the proper instructions and taking the necessary precautions to secure your child, you can be sure your little one will be safe and comfortable while riding in the car.

Secure the Chest Clip

It is essential to take extra care when adjusting the straps on your car seat. Before you begin, ensure your child’s harness straps are at or slightly above the shoulder level. This will ensure your child’s safety and comfort. Additionally, ensure the chest clip is centered over the chest, and the straps are not twisted. For a secure fit, the harness straps must be snug against the child’s body.

The chest clip should be secured once the harness straps are correctly adjusted. Press the chest clip firmly upwards and towards the shoulder harness straps. Double-check the harness adjustment settings and make sure the chest clip is secure. Taking the time to secure the chest clip properly will give you peace of mind, knowing that your child is safe and secure in the car seat.

Check the Fit of the Straps

To ensure the safety and comfort of your child. The straps should be at or slightly above the shoulder level for your child. If the straps are too high or too low, it could affect the car seat’s performance and make it less safe. Additionally, ensure the chest clip is centered over the chest, and the straps are not twisted. For a secure fit, the straps should be snug against the child’s body.

Hold the belt against the shoulder and adjust the length until it is snug but not too tight. Once the harness straps are correctly adjusted, it is essential to secure the chest clip. Simply press the chest clip firmly upwards and towards the shoulder harness straps to do this. The chest clip could quickly come undone during a crash if not secured. It is also important to double-check the harness adjustment settings to ensure the straps are properly secured. Attaching the chest clip properly will give you peace of mind, knowing that your child is safe and secure in the car seat.

Reattach the Seat Cover

It is a simple but essential task for properly securing a child in a car seat. Begin by uninstalling the seat cover and reattaching it in the opposite direction as the original. Ensure that the straps are not twisted and that the chest clip is centered over the chest.

Once the seat cover is securely fastened on the car seat, it is time to adjust the harness straps. Hold the belt against the shoulder and adjust the length until it is snug but not too tight. After the harness straps are in place, it is essential to secure the chest clip. Press the chest clip firmly upwards and towards the shoulder harness straps to do this.

Ensuring the chest clip is securely fastened is essential because it can quickly come undone during an accident. Double-check the harness adjustment settings to ensure the straps are correctly tightened and the chest clip is securely attached. Taking the time to secure the chest clip properly will give you peace of mind, knowing that your child is safe and secure in the car seat.

Check for Proper Installation

Of your child’s car seat. Ensure the straps are not twisted, and the chest clip is centered over the chest. Ensure that the straps are secured by tugging each belt to ensure they are tight. Adjust the length of the harness straps if necessary by holding the strap against the shoulder and adjusting it until it is snug but not too tight.

Once the harness straps are adjusted, securely fasten the chest clip. Press the chest clip firmly upwards and towards the shoulder straps to do this. Double-check the harness adjustment settings to ensure the belts are properly tightened and the chest clip securely attached. This is very important because it can quickly come undone during an accident.

Taking the time to secure the chest clip properly will give you peace of mind, knowing that your child is safe and secure in the car seat. Verify that the installation instructions match the car seat that you are using. If you need clarification on the installation, it is best to contact the manufacturer for assistance.

Conclusion

Adjusting the Evenflo 4 in-1 Car Seat straps is essential in ensuring your child’s safety. Ensuring the straps are correctly adjusted will help ensure your child is secure while riding in the car. After changing the straps, a good practice is to double-check the tightness of the belts by pulling on them to ensure that they are not too tight or loose. Taking the time to properly adjust the straps on your Evenflo 4 in-1 Car Seat will help provide your child with a safe and secure ride.

Filed Under: Car seats

Are Car Seats Required In Mexico

January 11, 2024 by WSwakil12 Leave a Comment

In Mexico, car seat laws vary from state to state. Generally, car seat laws require that children under 12 must be secured in a child restraint system or booster seat when travelling in a vehicle. However, the exact requirements vary by state, so it is important to check the laws of each state before travelling to Mexico.

In addition, some states may require that children under the age of three be secured in a rear-facing car seat, while others may require that children under four be secured in a forward-facing car seat. To ensure that your children are properly protected while travelling in Mexico, it is important to familiarize yourself with each state’s car seat laws and ensure that your children are properly secured in the appropriate car seat.

Overview of Mexican Car Seat Laws
Are Car Seats Required In Mexico?


In Mexico, car seat laws vary from state to state. Generally, car seat laws require that children under 12 must be secured in a child restraint system or booster seat when travelling in a vehicle. However, the exact requirements vary by state, so it is important to check the laws of each state before travelling to Mexico.

For example, children under three must be secured in a rear-facing car seat in some states, such as Chihuahua. In other states like Sonora, children under four must be secured in a forward-facing car seat. To ensure that your children are properly protected while travelling in Mexico, it is important to familiarize yourself with each state’s car seat laws and ensure that your children are properly secured in the appropriate car seat.

In addition to car seat laws, some states may also have additional safety measures to protect young passengers. For example, in Mexico City, children under six must be seated in the back seat of a vehicle and can only be seated in the front seat when all other back seats are occupied. This is to ensure that young passengers are not at risk of being seriously injured in the event of an accident.
Overall, Mexico has laws in place to protect young passengers, so it is important to ensure that you are familiar with them and abide by them. Doing so can help ensure your children are safe and secure while travelling in Mexico.

Types of Car Seats Acceptable in Mexico

Vary from state to state. The Mexican government takes the safety of young passengers seriously, so it is important to familiarize yourself with the various laws and regulations concerning car seat usage in each state. Children under three should be placed in a rear-facing car seat in most states. A forward-facing car seat is recommended for children between four to eight years of age.

For children over the age of eight, a booster seat is required. All car seats must be installed in the car’s rear seat and secured using the vehicle’s seat belt system. It is also important to note that Mexico’s Department of Tourism must approve all car seats. For further information regarding car seat laws in Mexico, consulting with a local car seat safety authority is recommended. Doing so can help ensure that your children are properly secured and protected while travelling in Mexico.

Rules for Children Under the Age of 4

These are extremely important to keep in mind while travelling in Mexico. The Mexican government takes the safety of young passengers seriously, so it is important to familiarize yourself with the various laws and regulations concerning car seat usage in each state. In most states, it is recommended that children under the age of three should be placed in a rear-facing car seat to maximize safety. A forward-facing car seat should be used for children between four and eight years of age.

All car seats must be installed in the car’s rear seat and secured using the vehicle’s seat belt system. It is also important to note that Mexico’s Department of Tourism must approve all car seats. For further information and details regarding car seat laws in Mexico, consulting with a local car seat safety authority is recommended. Doing so can help ensure that your children are properly secured and protected while travelling in Mexico.

Rules for Children Ages 4-12

It is important to keep this in mind while travelling in Mexico. According to the Mexican government, children between four and twelve must be secured in a booster seat. It is important to note that Mexico’s Department of Tourism must approve all booster seats and be installed in the rear seat of the vehicle. The seat belts should also be adjusted properly to the child’s size.

Also, the child should be positioned in the center of the seat, and the shoulder strap should not be placed under the child’s arm or behind the child’s back. Mexican law also recommends that all children be supervised while in the vehicle and that no child be left alone in the car. Ensuring that all safety regulations are followed to protect your children while travelling in Mexico is essential. Following the recommended safety guidelines for children between the ages of 4-12 can help keep your children safe while travelling.

Penalties for Violating Car Seat Laws

In Mexico can be severe. It is important always to follow the rules and regulations for proper car seat use outlined by the Mexican government. Failure to do so can result in fines, legal prosecution, and imprisonment. It is also important to know that the laws and regulations for car seat use in Mexico can vary from state to state. It is essential to determine the requirements in the area you are travelling to. The Mexican government also offers a free Car Seat Law information brochure online, outlining the different car seat use requirements and regulations.

The main penalty for violating car seat laws in Mexico is a fine. The fine amount will depend on the severity of the violation and the area where the violation occurred. In addition, the vehicle can be impounded, and the driver can be arrested and prosecuted. While the actual punishments for any violations will depend on the circumstances and severity, it is important to note that all drivers must follow the applicable regulations.

Violating car seat laws in Mexico is not only dangerous, but it can also be costly. It is, therefore, important to always follow the rules and regulations and ensure that all children are properly secured and protected while travelling in Mexico.

Tips for Safely Transporting Children in Mexico

Include always using age-appropriate car seats or booster seats, ensuring they are properly installed, and following all traffic laws and regulations. It is important to remember that Mexico has different car seat laws and regulations than other countries. For example, in Mexico, children under one year must use a rear-facing car seat and children over one year must use a forward-facing car seat. It is also important to note that in Mexico, the use of car seats or booster seats is required by law for children up to the age of 12 years. Therefore, it is essential to ensure that all children up to this age are properly secured in the vehicle.
Additionally, it is important to ensure that the car seat or booster seat is installed correctly and that all the straps are tightened and secured properly. It is also important to ensure the car or booster seat is properly secured into the vehicle. Ensure it is firmly attached and all the straps and belts are properly tightened and secure. Finally, following road safety laws and regulations is important when transporting children in Mexico. This includes obeying all traffic laws, avoiding distractions like mobile phones, driving safely, and always wearing a seatbelt. Following these tips can help ensure your children are safe and secure while travelling in Mexico.

Conclusion

Car seats are required in Mexico by law for children under 12, and the driver must make sure all passengers are safely restrained. It is important to know the law in Mexico and be aware of the safety requirements for children to avoid fines or penalties. It is also important to ensure that the car seat is properly installed and used correctly to ensure the child’s safety.

Filed Under: Car seats

How To Remove Evenflo 360 Car Seat From Base

January 2, 2024 by WSwakil12 Leave a Comment

Installing a car seat can be challenging, but removing it can be even more difficult. The Evenflo 360 car seat is no exception. If you’ve been trying to figure out how to remove the Evenflo 360 car seat from the base, then this post is for you. We’ll walk you through how to remove your Evenflo 360 car seat from the ground and a few tips and tricks to make the process easier. So, let’s get started!

Read and Understand the Car Seat’s User Manual

Before removing your Evenflo 360 car seat from the base, ensure you have read and understand the car seat’s user manual. The user manual will provide you with step-by-step instructions for removing the car seat from the base and any safety precautions you need to take.

You must understand the instructions before removing the car seat from the ground. Pull the Release Handle. Once you’ve read and understood the user manual, you’ll need to locate the release handle on the car seat and pull it to release the car seat from the base.

Make sure that you are removing the release handle in the correct direction. If you’re having trouble locating the release handle, consult the user manual for further information. Lift the Car Seat from the Base. Once the car seat has been released from the base, you can lift it off the ground and place it on the floor.

Be sure to lift the car seat from the bottom slowly and carefully, and never attempt to lift the car seat by the straps or harness. Keep the user manual safe, and re-assemble the car seat when needed. These steps will help you safely remove the Evenflo 360 car seat from the base. For further questions or concerns, consult the user manual for instructions and guidance.

 
Locate the Release Lever

On the Evenflo 360 car seat. This is typically located on the side of the car seat, near the bottom. Depending on the model of your car seat, the release lever may be a latch, a button, or a slider. However, the instructions for releasing the car seat from the base should be the same regardless of the release lever type.

Make sure that you are pulling the release handle in the correct direction. If you’re having trouble locating the release handle, consult the user manual for further information. Once the car seat has been released from the base, you can lift it off the ground and place it on the floor.

Be sure to lift the car seat from the bottom slowly and carefully, and never attempt to lift the car seat by the straps or harness. Also, ensure the car seat is securely fastened to the base before use. Keep the user manual safe, and re-assemble the car seat when needed.

These steps will help you safely remove the Evenflo 360 car seat from the base. For further questions or concerns, consult the user manual for instructions and guidance.

 
Push the Release Lever and Lift the Car Seat Away from the Base

It is an important step when removing an Evenflo 360 car seat from its base. First, locate the release handle on the side of the car seat and ensure you pull the handle in the correct direction. If you need help finding the release handle, consult the Evenflo 360 user manual for further information.

After the car seat has been released from the base, carefully lift it off the ground and place it on the floor. It is important to never raise the car seat by the straps or the harness, as this could be dangerous.
Additionally, you should always ensure the car seat is securely fastened to the base before use.

Once you have safely removed the Evenflo 360 car seat from the ground, re-assemble the car seat using the user manual as a guide. Keep the user manual in a safe place for future reference. These steps will help you safely and efficiently remove the Evenflo 360 car seat from the base. Please consult the user manual for instructions and guidance if you have further questions or concerns.

 
Remove the Car Seat from the Vehicle

Removing the Evenflo 360 car seat from the vehicle is easy when done correctly. To begin, locate the release handle on the side of the base. Then, press the release handle down and pull up on the car seat to release it from the ground. Use your knee to secure the underside for added stability while removing the car seat.

When lifting the car seat off the base, ensure that the straps and harness are not tangled and that all buckles are unbuckled. This will ensure the car seat is safely and securely removed from the base. Additionally, never lift the Evenflo 360 car seat off the ground by its straps or harness. This could cause the car seat to become damaged or even cause it to become unsafe for use.

Once you have removed the Evenflo 360 car seat from the base, you can re-assemble the car seat using the user manual as a guide. This guide will help make re-assembly a breeze. Make sure to keep the user manual in a safe place for future reference.

Following these guide steps will help you remove the Evenflo 360 car seat from the vehicle safely and efficiently. Please consult the user manual for instructions and guidance if you have further questions or concerns.

 
Reinstall the Car Seat in the Vehicle

It is a crucial step to ensure safe travels for you and your family. Evenflo provides a user manual for reinstalling the Evenflo 360 car seat from the base. You should never lift the Evenflo 360 car seat off the ground by its straps or harness, as this could cause the car seat to become damaged or unsafe. Following the steps in the user manual will help make re-assembly a breeze. After reinstalling the car seat, it is essential to double-check that the car seat is securely placed in the vehicle and that the straps and harness have been adjusted so that your child is secure and comfortable.
Additionally, make sure to keep the user manual in a safe place for future reference. Please consult the user manual for instructions and guidance if you have further questions or concerns. Taking the time to properly reinstall the car seat is essential for your family’s safety and should not be overlooked.

Conclusion

Removing your Evenflo 360 car seat from the base is an easy process. To detach the car seat, press the release button on the side of the ground, push it up, and pull it away from the base. Once you’ve removed the car seat from the floor, you can move it to another vehicle or store it for later use. Remember that to ensure your child’s safety, you should always replace any damaged parts and check for recalls before installing the car seat.

Filed Under: Car seats

How To Loosen Straps On Evenflo Car Seat

December 18, 2023 by WSwakil12 Leave a Comment

Installing a car seat for a child can be a daunting task for many parents, especially when adjusting the straps to fit their child. If you’ve recently purchased an Evenflo car seat, you’re likely already familiar with tightening the belts but may wonder how to loosen them. In this article, we’ll discuss the steps to reduce the straps on an Evenflo car seat so that you can ensure your child is always safe and secure.

Read the User Manual

For your Evenflo car seat, ensure that you follow the proper instructions for loosening the straps. You should follow the specific instructions for your model, as car seat models vary. The User Manual should provide step-by-step instructions on how to loosen the straps and information on how to adjust them properly.

Call any auto customer service line for assistance if you cannot access the User Manual. You can also check the company’s website for any available online resources. Be sure to read the instructions before you begin adjusting the straps, as this will help you avoid any potential mistakes. Ensuring the straps are correctly adjusted and secure to keep your child safe is essential.

 
Adjust the Harness Strap Position

To ensure your child is always safe and secure in your car seat, it is essential to adjust the harness straps appropriately. Loosening the straps on an Evenflo car seat can be done in a few simple steps.

First, read the User Manual for your specific Evenflo car seat model to ensure you follow the appropriate instructions for loosening the straps. Once you have read the instructions, follow the steps to reduce the straps. Double-check that the straps have been sufficiently loosened and are tight enough. You can also check the company’s website for any online resources.

The straps should be close enough to keep your child secure but not so close that it is uncomfortable or constricting. Once the straps have been adjusted and secured correctly, ensure your child is buckled in securely and can be easily removed in an emergency. Properly adjusting the straps will help ensure your child is safe and secure while riding in the car.

 
Locate the Straps

On an Evenflo car seat, ensure your child is safe and secure while riding in the car. Before you start loosening the straps, be sure to read the User Manual for your specific Evenflo car seat model. This will ensure that you follow the appropriate instructions for reducing the straps.

Once you have read the instructions, follow the steps provided to facilitate the straps, and double-check that the straps have been sufficiently loosened and are tight enough. You can also check the company’s website for any online resources. The straps should be close enough to keep your child secure but not so tight that it is uncomfortable or constricting.

Once the straps have been adjusted and secured correctly, ensure your child is buckled in securely and can be easily removed in an emergency. Properly adjusting the straps will help ensure your child is safe and secure while riding in the car. When changing the straps, take your time and pay attention to any warnings the manufacturer provides. If you have any questions or concerns, you should always consult a qualified and experienced car seat technician to ensure your child is safe and secure.

Identify the Release Mechanism

for the car seat you are using. This will help you with adjusting the straps to an appropriate tightness. Most car seat models have a release mechanism located on the bottom of the seat. A small lever or latch is usually responsible for loosening the straps. You can also identify the release mechanism by looking at the manual that came with the car seat.

Ensure you read the instructions carefully and understand the steps for releasing the straps. Once you identify the release mechanism, follow the instructions to loosen the straps. You can double-check the tightness of the belts by pulling them away from the car seat. Ensure the straps are not so tight that they constrict your child or so loose that they are not secure.

Additionally, you should always check the company’s website for updated information on using the car seat. Following these steps ensures that your child is properly secured while riding in the car.

 
Push the Release Mechanism

A car seat is an important step that all parents should know about. The release mechanism is a small lever or latch that allows you to loosen the car seat straps. Identifying the release mechanism and understanding the instructions for releasing the belts are essential to properly securing your child in the car seat.

The best way to find the release mechanism is to look at the manual that came with the car seat. After you identify the release mechanism, you should follow the instructions on how to use it. Once the straps are loosened, double-check the tightness of the belts. Pull them away from the car seat to ensure they are not too tight or loose.

If needed, check the company’s website for updated information regarding the proper use of car seats. Always properly secure your child in the car seat before driving. These simple steps will ensure your child remains safe and secure while riding in the car.

 
Check the Straps for Proper Adjustment

It is essential to check the straps for proper adjustment anytime your child is in a car seat. First, identify the release mechanism by referencing the manual accompanying the car seat. After you place the release mechanism, you should follow the instructions on how to use it.

Once the straps are loosened, double-check the tightness of the belts. Pull them away from the car seat to ensure they are not too tight or loose. If needed, check the company’s website for updated information regarding the proper use of car seats. Pay close attention to the instructions for the specific car seat you are using. If the straps are too tight or loose, you risk the car seat not correctly securing your child should you be in an accident.

Ensuring that the straps are correctly adjusted every time your child is in their car seat is essential. Properly adjustable and secured straps can be the difference between life and death in the event of an accident. Always properly secure your child in the car seat before driving. These simple steps will ensure your child remains safe and secure while riding in the car.

 
Pull on the Adjustment Straps at the Bottom of the Car Seat

To make sure they are not too tight or too loose. Properly adjusted straps are essential for properly securing your child in the car seat in the event of an accident. Before each use, double-check the instructions for your specific heart. Pull the straps away from the car seat to ensure they are not too tight or loose.

If the straps are too tight or loose, it can compromise your child’s safety in the event of an accident. Also, be sure to check the company’s website for updated information regarding the proper use of car seats. You must adjust the straps to ensure your child is correctly secured in the car seat.

Always properly secure your child in the car seat before driving. These simple steps will ensure your child remains safe and secure while riding in the car.

 
Reinstall the Car Seat According to the Manufacturer’s Instructions

It is essential to ensure your child’s safety in the event of an accident. Before each use, it’s important to double-check the instructions for the specific seat you are using. Read the instruction manual that came with your car seat to ensure the installation is done correctly.

Pull the straps away from the car seat to ensure they are not too tight or loose. If the straps are too tight or loose, it can compromise your child’s safety in the event of an accident.

Additionally, check the company’s website for any updated information regarding the proper use of car seats. Make sure that all of the straps are correctly adjusted and securely around your child. Once the straps are in the correct position, tallen the car seat. Using the seatbelt or lower anchors will secure the car seat to the car.

Remember to check the car seat regularly to ensure it is properly adjusted. It is also essential to always correctly secure your child in the car seat before driving. Following these simple steps ensures that your child is safe and secure while riding in the car.

Conclusion

The process of loosening straps on an Evenflo car seat is pretty simple. With a few simple steps, you can reduce the straps and ensure your child is comfortable and safe when riding in the car. Remember to check the belts occasionally to ensure they have stayed tight enough. If they have, follow the steps above to loosen them again. If you have any questions or concerns about the straps on your Evenflo car seat, contact the manufacturer for more information.

Filed Under: Car seats

How To Install Evenflo 360 Car Seat

December 14, 2023 by WSwakil12 Leave a Comment

Installing a car seat is essential to child safety and can be intimidating. But, with the proper instructions, it doesn’t have to be daunting. In this guide, we’ll walk you through installing an Evenflo 360 Car Seat in your car. We’ll cover both rear-facing and forward-facing installation steps and provide helpful tips and tricks. So, let’s get started!

Read the Car Seat Instruction Manual

Before you start, every car seat is different, and the Evenflo 360 Car Seat is no exception. So, read your car seat’s instruction manual and familiarize yourself with the setup and installation process. This will help ensure that you have the most up-to-date information regarding the car seat installation and can help you ensure it is properly secured in your car.

Additionally, the manual will include any additional instructions for your vehicle model. Once you’ve read through the car seat instruction manual, you’ll be ready to move on to the installation process.

Familiarize Yourself With Your Vehicle’s Seating System

Before you begin installing your Evenflo 360 Car Seat, take some time to familiarize yourself with your vehicle’s seating system. Look at your car’s owner’s manual and take some time to understand where your car’s seat belts are located.

This will help you determine the best location for your car seat. Additionally, take some time to understand your car’s LATCH system. LATCH stands for lower anchors and tethers for children, and it is a system used to secure car seats into vehicles without seat belts. Once you’ve familiarized yourself with your vehicle’s seating system, you’ll be ready to begin installing your Evenflo 360 Car Seat.

Install the Base

For your Evenflo 360 Car Seat. Begin by putting the base into your vehicle’s back seat. You can use the car’s seat belts or the LATCH system to secure the base. If you are using the seat belts, make sure they are routed through the slots in the ground.

Once you have routed the seat belt, pull it tightly to secure the car seat in place. Once you have the seat belt, move on to the LATCH system. The LATCH system will require that you attach the anchors from the base to the anchor points in your vehicle. Once you have connected the anchors, use the LATCH strap to secure it.

Make sure it is tightly secured by pulling the strap until it clicks. Once you have confirmed the base in place, you can move on to the next step.

Secure the Base to the Vehicle Seating System

It is essential for ensuring the safety of your child. Ensuring the car seat base is adequately secured to the vehicle’s seating system is necessary. You can use the car’s seat belts or the LATCH system to ensure the bottom. If you are using the seat belts, ensure they are routed through the slots in the base.

Once you have routed the seat belt, pull it tightly to secure the car seat in place. Once you have the seat belt, move on to the LATCH system. The LATCH system will require that you attach the anchors from the base to the anchor points in your vehicle. Once you have connected the anchors, use the LATCH strap to secure it. Make sure it is tightly secured by pulling the strap until it clicks.

To check if the car seat is reserved correctly, try pushing the base side to side and up and down. If the base does not move, it is connected properly. If it does move, it needs to be re-secured. Once you have secured the floor, you can move on to the next step. Following these steps will ensure your child’s safety and provide peace of mind whenever you are driving.

Attach the Seat to the Base

In your car, use the LATCH system. Secure the base to the anchor points in your vehicle using the anchors. After securing the anchors, use the LATCH strap to securely attach the seat to the ground. Make sure the strap is tightly secured by pulling it until it clicks into place.

To check if the car seat is connected correctly, try pushing the base side to side and up and down. If the base does not move, it is adequately secured. If it does move, it needs to be re-secured. Once you have confirmed the floor in place, you can move on to the next step. Following these steps is essential for ensuring your child’s safety and that you have peace of mind when driving.

Secure the Seat to the Base

It is a crucial step to ensure the safety of your child. Before doing so, make sure the anchors in your vehicle are secured. Then, use the LATCH strap to attach the seat to the base securely. Make sure the strap is tightly secured by pulling it until it clicks into place. To check if the car seat is connected correctly, try pushing the base side to side and up and down.

If the base does not move, it is adequately secured. If it does move, it needs to be re-secured. After the seat is guaranteed, check the straps to make sure they are snug and not too tight. Adjust and tighten the belts as needed. Also, ensure the harness straps are at or below your child’s shoulders. Once all these have been checked and double-checked, you can be sure you have given your child the best protection on the road.

Adjust the Harness Height and Harness Straps

Ensure your child is securely fastened in the car seat. Slide the height adjustment bar to the correct level to adjust the harness height. This should be at or even below your child’s shoulders:

  1. To change the shoulder straps, make sure they are pulled tight enough by removing the belt until it clicks into place.
  2. Check that the car seat is secured correctly by pushing the base side to side and up and down. If the base does not move, it is adequately secured. If it does move, re-secure it.
  3. Adjust and tighten the straps as needed.

Be sure to check and double-check the harness height and straps before each car ride to ensure your child’s safety.

Test the Installation

By using a straightforward method. Begin by sliding the height-adjustment bar up or down to the correct level. This should be at or even below your child’s shoulders. Once that is done, check that the shoulder straps are pulled tight enough and have clicked into place.

After that is complete, push the base side to side to ensure it is adequately secured. If it is not guaranteed, re-secure and adjust the straps as needed. Double-check the height-adjustment bar and the straps before every car ride to ensure safety. Also, it is essential to read the car seat manual to be aware of any special instructions for your specific seat.

Finally, get an installation check from a certified technician to ensure the seat is installed correctly. Following these steps will guarantee your child’s safety while riding in the car.

Conclusion 

The Evenflo 360 car seat is an excellent choice for parents who want an easy-to-install, safe car seat for their little ones. Always follow the manufacturer’s directions and check the seat to ensure it is correctly installed. With the help of the intuitive design and the included instructions, you can have your Evenflo 360 car seat installed in just a few minutes. With a secure fit and the peace of mind that comes with knowing your child is safe and secure, you can rest easy when you hit the road.

Filed Under: Car seats

How To Clean Nuna Pipa Car Seat

December 9, 2023 by WSwakil12 Leave a Comment

Keeping your car seat clean is essential to ensuring the safety and comfort of your little one. But with so many car seat models on the market, it can take a lot of work to know exactly how to clean a specific type. In this post, we’ll walk you through the steps to clean a Nuna Pipa car seat. We’ll also provide some tips to maintain and protect your car seat over time. So let’s get started!

Gather the Necessary Cleaning Supplies

Before you start cleaning, you’ll want to make sure you have the right supplies on hand. You’ll need a vacuum cleaner, a soft cloth or sponge, mild soap, a solution of 1 part vinegar to 5 parts water, and a clean, dry brush. With these supplies, you’ll be ready to start cleaning your Nuna Pipa car seat! Vacuum the Car Seat: Start by vacuuming the car seat thoroughly.

This will help remove any dust and dirt that has collected on the surface of the seat. Be sure to use a soft brush attachment to avoid damaging the fabric of the chair. Once you’re done, wipe down the entire seat with a damp cloth.

Clean the Cover and Harness: Soak the cover of your car seat and the straps of the harness in a mild soap and warm water solution. Scrub gently using a soft sponge or cloth. Once you’ve cleaned the cover, rinse it with clean, warm water and hang it to dry. Clean the Buckles and Clasps: Soak the buckles and clasps in a solution of one part vinegar to five parts water. Use a soft brush to scrub them and remove any dirt and grime.

Rinse them off with clean, warm water and let them air dry. Last Step: Once you’ve finished cleaning the car seat, let it sit and air dry for at least an hour. This will help ensure that all of the cleaning solutions you use are entirely removed from the fabric. Taking these steps will help keep your Nuna Pipa car seat looking like new for years to come.

Remove the Harness from the Car Seat

Before you begin cleaning the car seat, you’ll need to remove the harness from the centre. To do this, first, unclip the straps from the car seat. Make sure to take note of how the harness is attached to the centre so that you can easily reattach it when you are finished. Next, remove the cover of the saddle and set it aside.

You’ll need to clean this separately. Lastly, carefully remove the buckles and clasps from the car seat. Now that the harness has been removed, you’ll need to clean the car seat. Start by vacuuming the fabric of the heart to remove any dirt and debris. Then, use a mild detergent and warm water to scrub the material. Scrub gently using a soft sponge or cloth. Once you’ve cleaned the cover, rinse it with clean, warm water and hang it to dry.

Clean the Buckles and Clasps:

  1. Soak the buckles and clasps in a solution of one part vinegar to five parts water.
  2. Use a soft brush to scrub them and remove any dirt and grime.
  3. Rinse them off with clean, warm water and let them air dry.

Last Step: Once you’ve finished cleaning the car seat, let it sit and air dry for at least an hour. This will help ensure that all of the cleaning solutions you use are entirely removed from the fabric. Taking these steps will help keep your Nuna Pipa car seat looking like new for years to come.

Vacuum the Car Seat

Vacuuming your car seat is an essential part of maintaining and caring for it. Start by removing the straps from the car seat and then vacuum the entire surface with a handheld vacuum. Make sure to pay special attention to crevices and cracks, as dirt and debris can quickly accumulate in these areas.

If you don’t have a handheld vacuum, use a brush attachment on your regular vacuum cleaner to reach these hard-to-reach spots. After you’ve finished vacuuming the car seat, use a soft, damp cloth to wipe down the entire seat. Prevent any moisture from seeping into the foam padding or buckles. Make sure to dry the centre entirely before you move on to the next step.

Spot Clean the Car Seat

Spot cleaning is an essential part of keeping your Nuna Pipa car seat looking new. For spot cleaning, use a soft cloth dampened with warm water and a small amount of detergent. Gently dab the soiled areas until they are clean, taking care to avoid rubbing the fabric.

If the stain persists, you can use a small amount of rubbing alcohol to help remove the stain. Be sure to air-dry the spot before you move on to the next step. Vacuuming your car seat is essential for adequately cleaning it.

Start by removing the straps from the car seat and then vacuum the entire surface with a handheld vacuum or with a brush attachment on your regular vacuum. Be sure to pay special attention to crevices and cracks, as dirt and debris can quickly accumulate in these areas.

After you’ve finished vacuuming the car seat, use a soft, damp cloth to wipe down the entire rear and dry it. This will help ensure that all of the cleaning solutions you use are entirely removed from the fabric. Taking these steps will help keep your Nuna Pipa car seat looking like new for years to come.

Clean the Harness

Of your Nuna Pipa car seat regularly to ensure its longevity. First, use a mild soap and damp cloth to gently remove any dirt and debris from the surface of the harness. If there are any stubborn stains, you can use a wet cloth with a bit of rubbing alcohol to help remove them. Remember always to air-dry the area after you finish cleaning.

After you’ve finished cleaning the harness, it’s time to vacuum the entire seat. Start by removing the straps from the car seat, and then use a handheld vacuum or brush attachment on your regular vacuum to thoroughly clean the whole heart. Pay special attention to crevices and cracks, as dirt and debris can accumulate in these areas.

Once you’re done with the vacuuming, use a soft, damp cloth to wipe down the entire seat and dry it. Following these steps will help to keep your Nuna Pipa car seat looking and functioning like new for many years to come.

Clean the Shell of the Car Seat

It is one of the most critical steps to keep your Nuna Pipa car seat looking and operating like new. First, use a mild soap and damp cloth to gently remove any dirt and debris from the surface of the harness. If there are any stubborn stains, you can use a wet cloth with a bit of rubbing alcohol to help remove them.

Remember always to air-dry the area after you finish cleaning. After you’ve finished cleaning the harness, it’s time to vacuum the entire seat. Start by removing the straps from the car seat, and then use a handheld vacuum or brush attachment on your regular vacuum to thoroughly clean the entire seat.

Pay special attention to crevices and cracks, as dirt and debris can accumulate in these areas. Once you’re done with the vacuuming, use a soft, damp cloth to wipe down the entire seat and dry it. Make sure to get into all the corners and crevices to remove any dust or dirt that was missed by the vacuum. Following these steps will help to keep your Nuna Pipa car seat looking and functioning like new for many years to come.

Clean the Canopy

Your Nuna Pipa car seat is one of the most critical steps to keep your car seat in the best condition. Start by removing the Canopy from the car seat and then use a damp cloth with a bit of mild detergent to clean away any dirt or debris. Make sure to pay special attention to any straps or buckles attached to the Canopy, as these can be difficult to remove if they become stuck.

Vacuuming the Canopy will also help to remove any dirt or debris that the damp cloth was unable to remove. If there are any stubborn stains, you can use a wet cloth with a bit of rubbing alcohol to help remove them. Remember always to air-dry the area after you finish cleaning.

After you’ve finished cleaning the harness, it’s time to vacuum the entire seat. Start by removing the straps from the car seat, and then use a handheld vacuum or brush attachment on your regular vacuum to thoroughly clean the entire seat. Pay special attention to crevices and cracks, as dirt and debris can accumulate in these areas. Once you’re done with the vacuuming, use a soft, damp cloth to wipe down the entire seat and dry it.

Make sure to get into all the corners and crevices to remove any dust or dirt that was missed by the vacuum. Following these steps will help to keep your Nuna Pipa car seat looking and functioning like new for many years to come.

Clean the Fabric Inserts

It is one of the most critical steps in maintaining your car seat’s longevity, especially the fabric inserts. To start:

  1. Remove the fabric inserts and vacuum the area first to remove any dust and debris.
  2. Use a gentle brush attachment on the vacuum for this task.
  3. Once that is done, spot-clean any stains with a damp cloth and a mild detergent.

If there are any tougher stains, you can use a damp cloth with a bit of rubbing alcohol to help remove them. Remember always to air-dry the area after you finish cleaning. After you’ve finished cleaning the harness, it’s time to vacuum the entire seat. Start by removing the straps from the car seat, and then use a handheld vacuum or brush attachment on your regular vacuum to thoroughly clean the entire seat.

Pay special attention to crevices and cracks, as dirt and debris can accumulate in these areas. Once you’re done with the vacuuming, use a soft, damp cloth to wipe down the entire seat and dry it. Make sure to get into all the corners and crevices to remove any dust or dirt that was missed by the vacuum. Following these steps will help to keep your Nuna Pipa car seat looking and functioning like new for many years to come.

Clean the Car Seat Base

Cleaning the car seat base should be done on a regular basis to ensure that it is safe, comfortable, and in proper condition. Start by wiping down the entire seat base and harness with a soft, damp cloth. Wipe off any visible dirt or debris. If there are any tougher stains, you can use a wet cloth with a bit of rubbing alcohol to help remove them.

Remember always to air-dry the area after you finish cleaning. After you’ve finished cleaning the harness, it’s time to vacuum the entire seat. Start by removing the straps from the car seat, and then use a handheld vacuum or brush attachment on your regular vacuum to thoroughly clean the entire seat. Pay special attention to crevices and cracks, as dirt and debris can accumulate in these areas. Once you’re done with the vacuuming, use a soft, damp cloth to wipe down the entire seat and dry it.

Make sure to get into all the corners and crevices to remove any dust or dirt that was missed by the vacuum. Following these steps will help to keep your Nuna Pipa car seat looking and functioning like new for many years to come.

Reassemble the Car Seat

After cleaning, begin by gathering all the pieces of the car seat and read through the instruction manual before starting to reassemble. Start by placing the seat cushion back into the base and properly connecting the straps.

After the cushion is secure, attach the straps to the car seat. Once the straps are in place, make sure they are in the correct order according to the instruction manual. Secure the straps with the hook-and-loop fasteners. Next, secure each of the shoulder pads to the straps. Make sure the strap adjusters are tightened to their proper position. Installing the shoulder pads and the straps correctly helps ensure your child’s safety.

After the straps have been attached, place the chest clip onto the belts and make sure it is securely fastened. Finally, reattach the Canopy onto the car seat and make sure it is securely fastened. Reassembling the car seat correctly is essential to ensure your child’s safety. Following these simple steps will help keep your car seat looking and functioning like new for many years to come.

Conclusion

Cleaning a Nuna Pipa car seat is a simple task. With the right cleaning supplies and a gentle touch, you can easily keep your car seat looking like new. Regular cleaning and maintenance are essential to ensure that the car seat is safe and comfortable for your little one. To make sure your Nuna car seat is in top condition, follow the cleaning instructions and maintenance tips provided by the manufacturer. With a little bit of effort and a few simple cleaning supplies, you can keep your Nuna Pipa car seat looking tremendous and feed your little one with a safe and comfortable place to ride.

Filed Under: Car seats

  • « Go to Previous Page
  • Page 1
  • Page 2
  • Page 3
  • Page 4
  • Page 5
  • Go to Next Page »

Primary Sidebar

Recent Posts

  • How To Travel With Car Seat Base
  • How To Take Car Seat Off Evenflo Stroller
  • How To Remove Graco Snugride Car Seat From Base
  • Why Do Cars Feel Faster In The Passenger Seat
  • How To Store Infant Car Seat

Recent Comments

No comments to show.

Copyright © 2025 · parentsphere.net All rights reserved