• Skip to primary navigation
  • Skip to main content
  • Skip to primary sidebar
  • About Us
  • Contact Us
  • Affiliate Disclosure
  • Cookie Privacy Policy
  • Privacy Policy
  • Terms of Use
  • Sample Page

Essential Baby Products for New Parents

Essential Baby Products for New Parents | Your Guide to Parenthood

  • Home Page
  • Car seats

Car seats

How To Travel With A Baby Without A Car Seat

January 26, 2024 by WSwakil12 Leave a Comment

Travelling with a baby can be a challenge. It can be even more daunting when you don’t have a car seat. But don’t worry; there are ways to travel with a baby without a car seat. This post will discuss some tips and tricks for travelling with a baby without a car seat. You’ll learn how to make the journey safer and more comfortable for you and your baby. We’ll also discuss how to choose the right car seat for your baby and how to use it properly. Finally, we’ll look at some of the best car seat alternatives for travelling with a baby without a car seat.

Research the Rules and Regulations

In your area, before you travel with a baby without a car seat. States and countries have different laws and regulations that may impact your travels. Some locations may require you to use a car seat, even if travelling by other means.

Understanding these rules and regulations is essential before you travel with a baby. You don’t want to be caught breaking the law. Make sure you know the laws in your area before you start your journey. When in doubt, call the local police station or other authority or search for the relevant rules and regulations online.

Other helpful resources include the Department of Transportation website or the National Highway Traffic Safety Administration’s website. Understanding your area’s rules and regulations will help you travel safely with your baby.

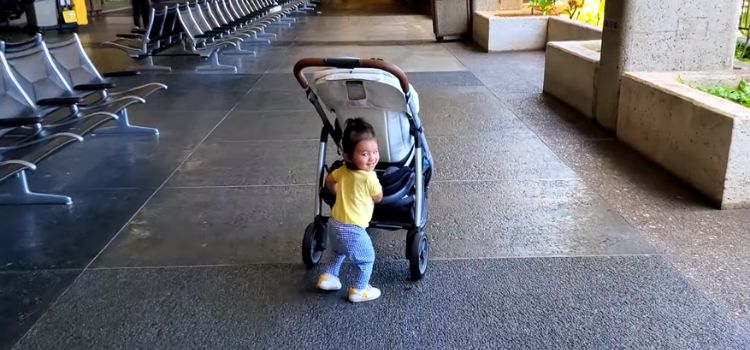
Choose the Right Mode of Transportation

Whether you travel locally or globally, choosing the proper transportation mode for you and your family is essential. Depending on the destination, different modes of transportation may provide different levels of convenience, cost-effectiveness, and safety.

For example, if you’re travelling with a baby, you may need to consider car seats, which are often required by law. If you’re going somewhere far, flying may be the best option. It may be more cost-effective and reliable. But if you are going somewhere nearby, you should take a train or bus. This can save you time and money, but you should always check the comfort and safety of the vehicle before you travel.

It is also essential to research the safety ratings of your chosen mode of transportation. This is particularly important if you are travelling with a baby. Understanding the rules and regulations for each mode of transportation is essential to ensure a safe and smooth journey.

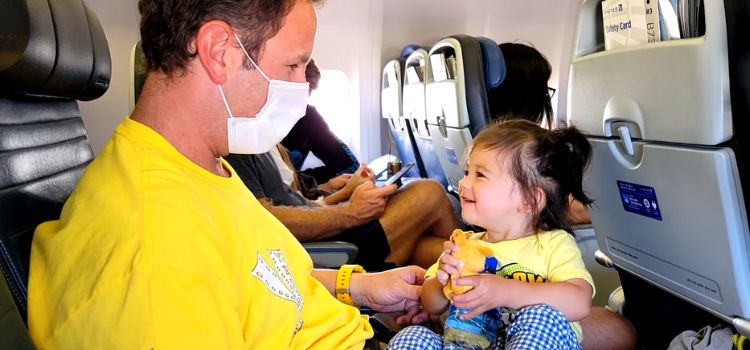
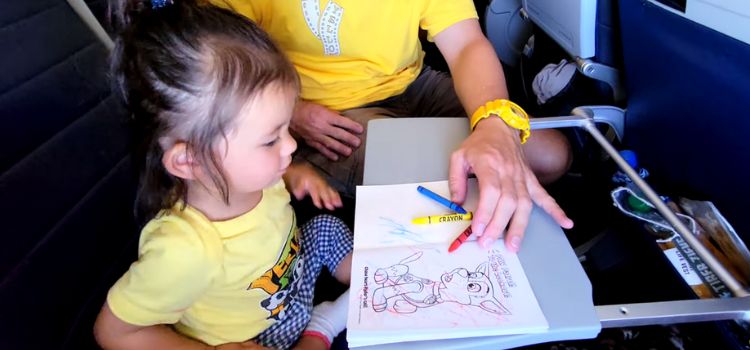
Prepare for the Flight

If you are taking a flight, planning and preparing ahead of time is essential. First, you should purchase plane tickets in advance to get the best prices. You should ensure you have all necessary documents and identification ready, such as passports.

It is also essential to know your airline’s luggage weight and size restrictions. You will also want to double-check the security regulations for carry-on items, as some items may not be allowed through security. It can also be helpful to ensure you have a credit or debit card with you in case of emergency expenses.

Finally, you should also research the destination ahead of time and ensure you know the transportation options available once you arrive. Planning and preparation can reduce stress and provide a safe and enjoyable flight.

Choose the Best Seats on the Plane

For the most comfortable and enjoyable flying experience, choosing the best seats on the plane is essential. To do this, you should first consider the layout of the aeroplane. Most planes are divided into economy, business, and first-class cabins.

Economy class is usually the most affordable option, while business and first-class cabins offer more legroom and amenities. If you are in economy, aim for the seats near the front, as they provide more legroom. It would help if you also tried to book a window seat as they offer more privacy. If you are in business or first-class, choose a seat closer to the front of the cabin.

These seats offer more space and better access to overhead storage and often come with additional amenities such as power outlets. Finally, you should also make sure to check the airline’s policies regarding seat selection. Some airlines have specific guidelines regulating seat selection and require passengers to select their seats when booking. By following these tips, you can choose the best seat on the plane and make your flight experience comfortable and enjoyable.

Pack the Necessary Supplies

Before travelling, ensure you have all the items you need for your trip. Remember to carry items like snacks, water, and a change of clothes in case of inclement weather. Pack any medications you might need, as well as essential documents like your passport and other forms of identification.

Filling any chargers or adapters required for your technology, such as cell phones, laptops, and other electronic devices, is also essential. You should also check the airline’s carry-on policy and determine the size dimensions of allowed carry-on bags.

Finally, bring a few lightweight items that can help you pass the time, such as books, a magazine, and a playlist. By taking the time to pack the right supplies before your trip, you can make your travel experience much more accessible and enjoyable.

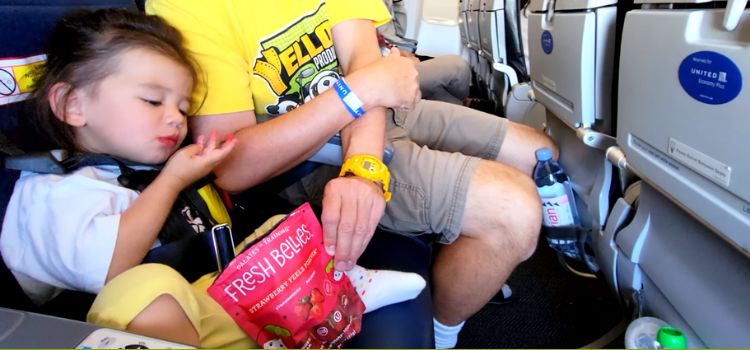
Create a Safe Sleeping Environment

Regarding air travel, creating a safe and comfortable sleeping environment is essential. This can help ensure you get a good night’s sleep and maximise your journey. To do this, select a window seat that provides the most privacy.

Then, pack a neck pillow and a light blanket or wrap to block out light and noise. You can also invest in ventilation-friendly earplugs or noise-cancelling headphones to block background noise. You can even bring along your eye mask to help you sleep.

When it comes to comfort, wear comfortable clothing and shoes to ensure a great flight. Lastly, set up a mini-tablet with your preferred movie, game, or music to help you pass the time. By following these tips, you can create a safe sleeping environment and make your air travel experience much more bearable.

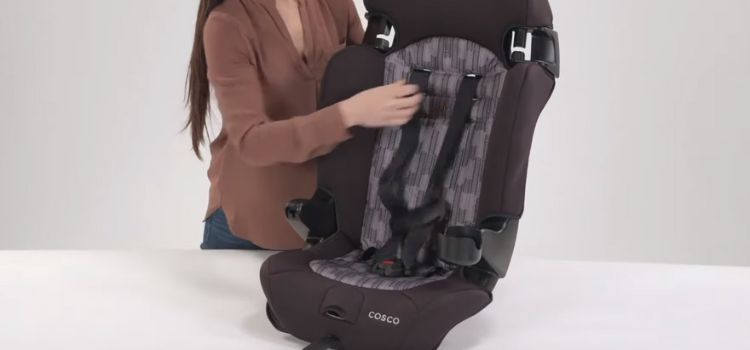
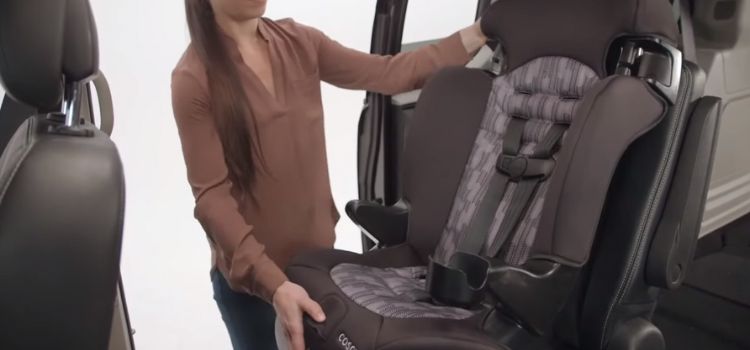
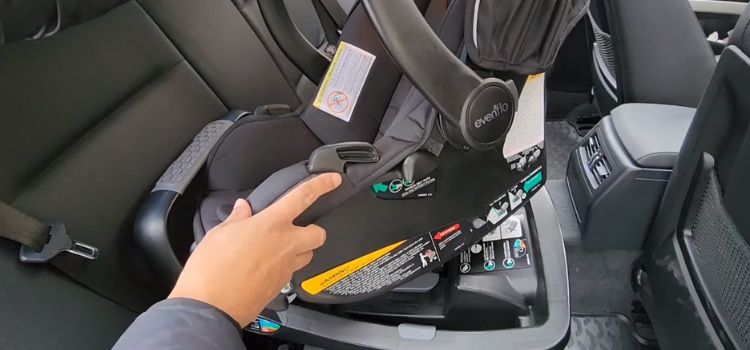
Check the Car Seat Regulations for Your Destination

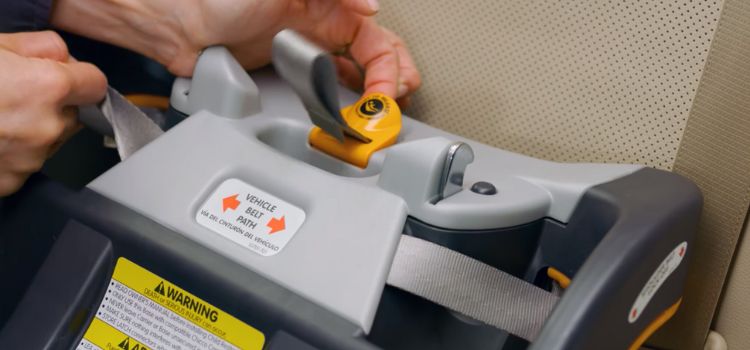
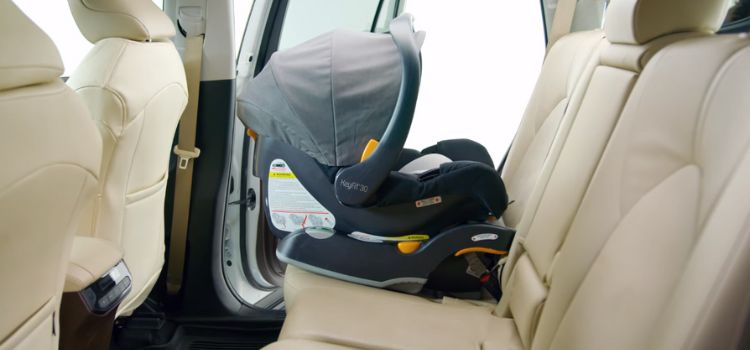
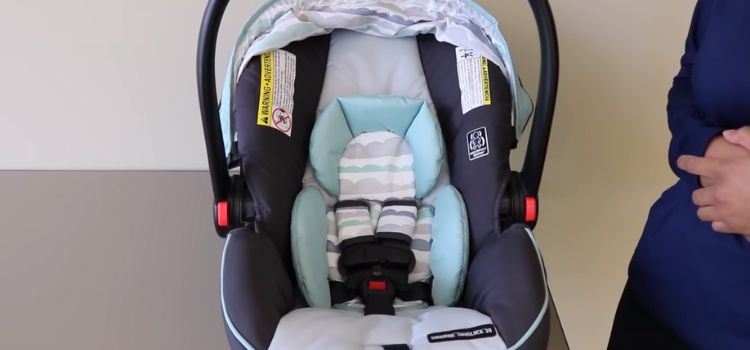
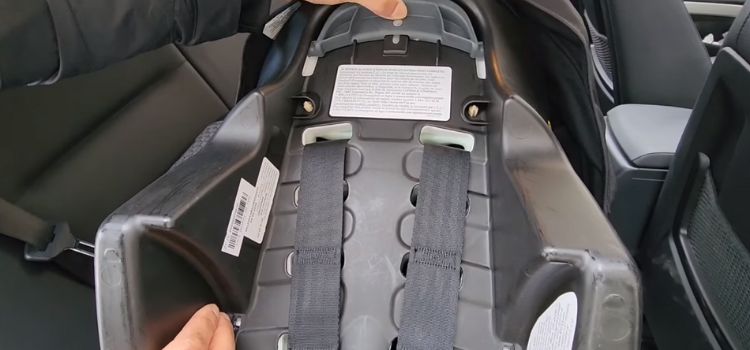
When travelling with children or infants. It is essential to know the laws and regulations of your destination regarding car seats. Different countries and states have other rules regarding the use of car seats. Knowing what type of seat is required for your child’s age, height, and weight. Ensuring the car seat is installed correctly and securely is also necessary. It is also a good idea to check the expiration date of your car seat as they may expire.

Additionally, check to see if your car seat will fit properly into your renting or borrowing car. These things can help keep your children safe and secure while travelling. Furthermore, follow other safety guidelines for your destination, such as wearing seatbelts or other protective gear. It is also essential to know the laws regarding the type of car seat used. By following the rules and regulations of your destination, you can ensure that your family is safe and secure.

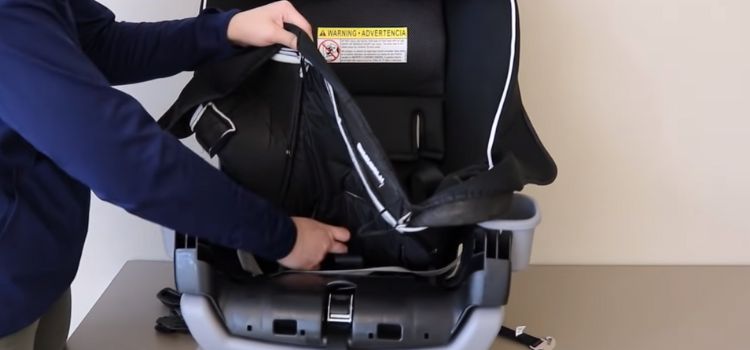
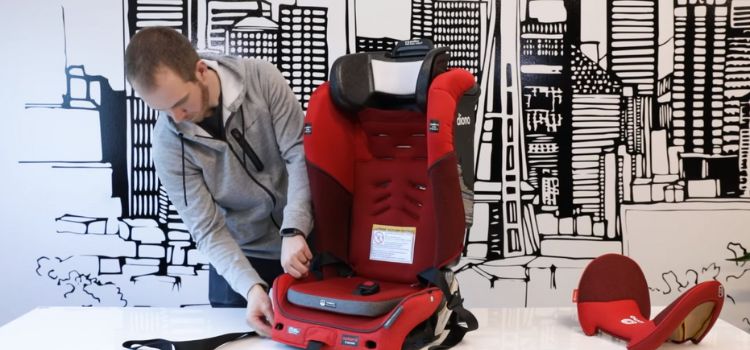
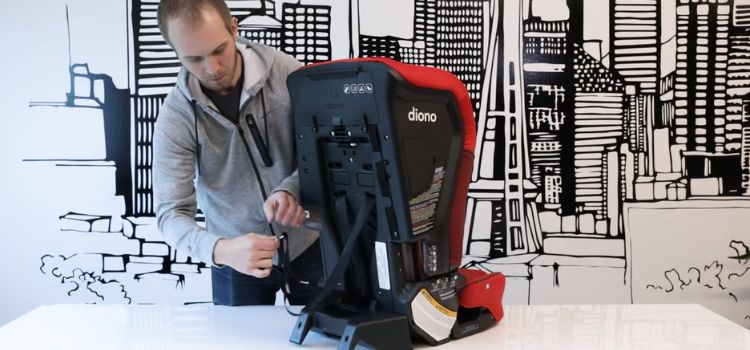
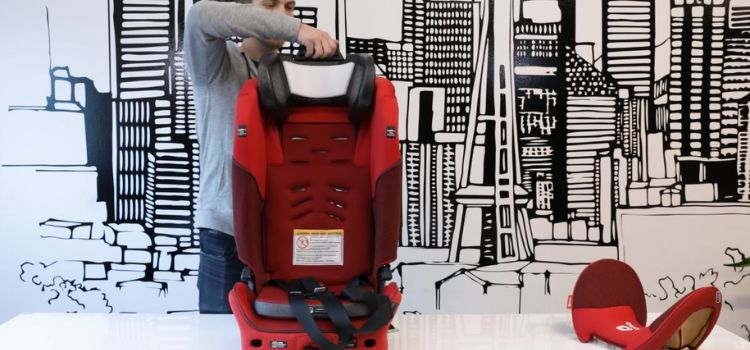
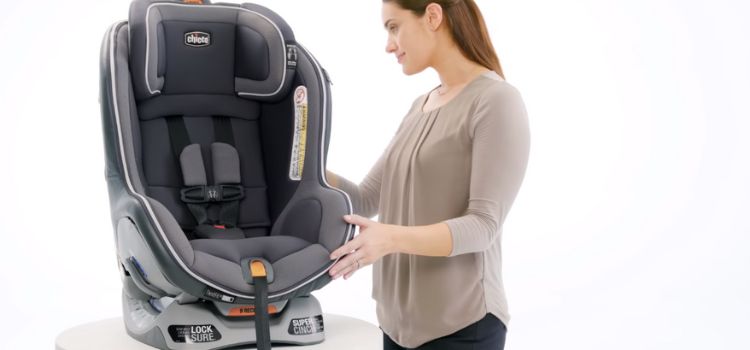
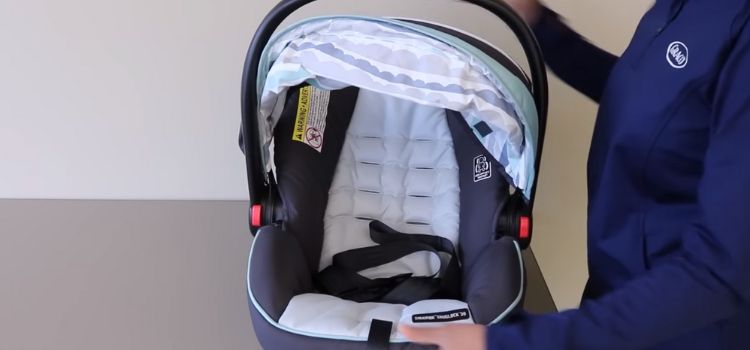
Consider Alternatives to Car Seats

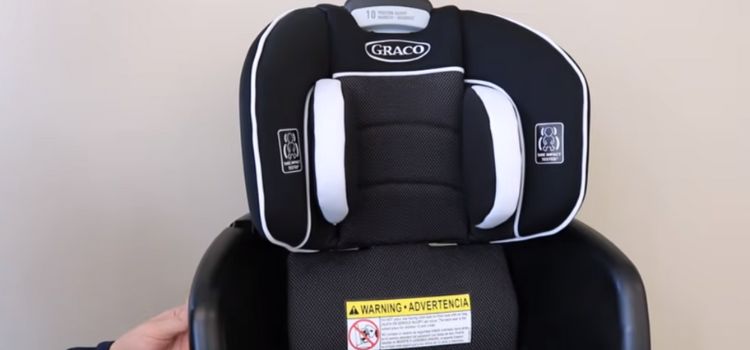
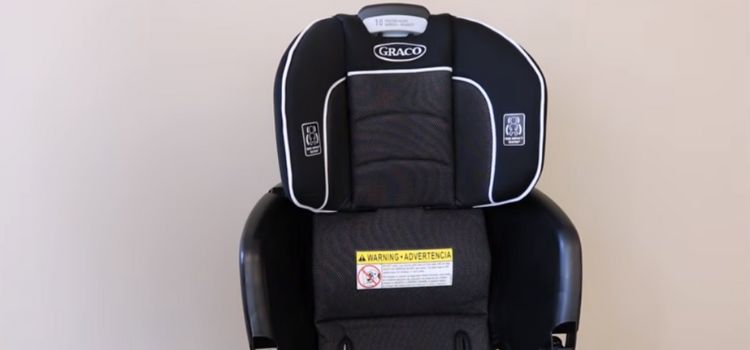
 There are various other options if you are looking for a car seat that fits your needs. For example, booster and convertible car seats can be used for children who are too large for infant car seats. Booster seats allow children to move to adult seat belts once they reach a certain age and height.

Convertible car seats are also designed for children of different sizes and can be adjusted as your child grows. Additionally, look into car cushions and other types of car seat accessories. These products provide additional protection for children and can help reduce the risk of injury in an accident.

When travelling with your family, it is essential to consider how you can best protect your children. Be sure to research the laws of your destination and the best car seat options available. By doing this, you can ensure that your family is safe and sound while travelling.

Conclusion

You are travelling travelling. Travelling with a baby without a car seat is challenging and often an endeavoured. However, with some thoughtful planning and preparation, it is possible to make the experience much safer and more enjoyable for you and your little one. Be sure to research and adhere to any relevant regulations and laws, consider the safety of your means of transport, and bring extra supplies and items that can make the journey more comfortable. With the proper preparations, you can ensure that your baby is safe and secure while you explore the world.

Filed Under: Car seats

How To Remove Graco Car Seat From Base

January 26, 2024 by WSwakil12 Leave a Comment

Removing a Graco car seat from its base can be a tricky process. It’s essential to know the proper steps to ensure that you don’t damage the seat and that it’s safely and securely installed. In this guide, we’ll walk you through the steps necessary to remove a Graco car seat from its base, from how to unlock the seat to store the base properly. We’ll also discuss some tips and tricks to make the process easier and quicker. By the end, you’ll be an expert at removing your Graco car seat from its base.

Read the Manual

Before attempting to remove a Graco car seat from its base, your Graco car seat manual should provide detailed instructions on safely and adequately unlocking the car seat and removing it from the base. Ensure you thoroughly review the manual for any warnings or cautions that may apply and understand the steps necessary to remove the car seat from its base safely. Failing to follow the instructions in your Graco car seat manual correctly can result in injury or damage to the car seat or its base, so be sure to read the manual before proceeding.

Unhook the Harness

Once you have read and understood the instructions in your Graco car seat manual, before removing your car seat from its base, you must detach the harness from the car seat to allow for easier removal. To do this:
Locate the buckle retention button located at the head of the car seat.
Push the button and slide the harness off the car seat before proceeding to the next step.
Keep all parts of the harness in a safe, secure place to avoid losing them during removal. Once the harness is off, you are ready to move on to the next step.

Unlock the Base

After removing the harness, you’ll need to unlock the car seat base. To do this, locate the release lever on the base and push it down to open it. You may need to consult your Graco car seat manual for additional instructions if the base does not unlock. Once the base is unlocked, you can proceed to the next step.

Lift and Remove

Now that the car seat base is unlocked, you can lift and remove the car seat from the base. Carefully grasp the handle of the car seat and lift it off the base. Place the car seat in a safe, secure location to prevent it from becoming damaged. Once the car seat has been removed, you can store the base in a safe spot.

Push the Release Button to Unlock the Base

The first step to remove the Graco car seat is to push the release button to unlock the base. To do this, locate the release lever on the base and press down. The lever should be visible and close to the car seat’s handle. Pressing the lever down firmly is essential to ensure the base is unlocked. You may need to consult your Graco car seat manual for additional instructions on properly opening the base. Once the base is unlocked, you can proceed to the next step.

Lift and Remove the Car Seat

Now that the car seat base is unlocked, you can lift and remove the car seat from the base. Carefully grasp the handle of the car seat and lift it off the base. Keep your fingers away from the release lever while lifting the car seat. Place the car seat in a safe, secure location to prevent it from becoming damaged. Once the car seat has been removed, you can store the base in a safe spot.

Pull the Handle

To unlock the base of your Graco car seat. Securely grasp the car seat handle and press the lever down firmly. This will allow the base to become unlocked and ready for use. Consult your Graco car seat manual for additional instructions on properly unlocking the base.

Once the base is opened, you can now lift and remove the car seat from the base. Keep your fingers away from the release lever while lifting the car seat. Place the car seat in a safe, secure location to prevent it from becoming damaged. Once the car seat has been removed, you can store the base in a safe spot. Always practice proper safety measures when handling car seats, and never leave the car seat unattended. Pulling the handle is an easy and essential step in properly securing your child in their Graco car seat.

Pull the Seat Away From the Base

It is essential to secure your child in their Graco car seat correctly. Make sure to unlock the base first, as your Graco car seat manual instructed. After the base has been opened, you can lift and remove the car seat. Keep your fingers away from the release lever while lifting the car seat. It’s best to place the car seat safely and securely to prevent it from becoming damaged.

Once the car seat has been removed, you can store the base in a safe, secure area. Always practice safety when dealing with car seats, and never leave them unattended. Pulling the handle is an easy and essential step in properly securing your child in their Graco car seat. Always keep your car seat in a safe, secure spot and never leave it unattended.

Remove the Base From the Vehicle

It is essential to ensure your child is safe in their Graco car seat. You must first unlock the base before removing the car seat from the base. To do this:
Follow the instructions in your Graco car seat manual.
After the base has been unlocked, lift the car seat off the base.
Keep your fingers away from the release lever while lifting the car seat. Once the car seat has been removed, you can store the base in a safe, secure area away from the car. It’s
It is essential to always leave the car seat in sight. You should also practice safety when dealing with car seats and remember to secure your child in their Graco car seat correctly. Pulling the handle is the last and easiest step in properly securing your child. When the car seat has been removed from the base, store it in a safe, secure area away from the car. This will help you ensure the car seat remains in good condition and safe for your child.

Conclusion

Removing a Graco car seat from its base is a relatively simple process that can be completed in a few steps:
It would help if you ensured the car seat was unlocked and the LATCH connectors were disengaged.
Push down on the red release button and pull the seat out of the base.
Lift the car seat up and off the base. It’s
It is important to remember always to follow the manufacturer’s instructions when installing and removing a car seat from its base. This will ensure your car seat is installed correctly and your child is safe while riding.

Filed Under: Car seats

How To Remove Diono Car Seat Cover

January 23, 2024 by WSwakil12 Leave a Comment

Diono car seat covers are designed to protect your car seat from dirt and spills, but sometimes, they can be tricky to remove. In this post, we’ll walk you through removing your Diono car seat cover step-by-step. We’ll also provide some helpful tips and tricks to make the removal process easier and quicker. When you’re done, you can easily remove your Diono car seat cover. Let’s get started!

Read the Diono Car Seat Manual

For important information regarding the installation and maintenance of your car seat. The manual provides essential information on adequately using and caring for your car seat. You must read the instructions carefully before using your car seat. In addition, the manual contains detailed instructions on how to remove the Diono car seat cover. The process is simple, but it is essential to follow the instructions carefully.

Start by unclipping the straps from the back of your Diono car seat. Unhook the straps from the sides and then gently pull the cover off. You may need a flathead screwdriver to push some clips to loosen the fabric. Once the cover is removed, inspect the car seat for any damage before reinstalling. Ensure no tears are in the fabric and all the straps are in working order.

Finally, wipe down the car seat with a damp cloth to remove dirt or residue before reinstalling the cover. Following these instructions will ensure your Diono car seat cover is removed safely and correctly.

Unbuckle the Car Seat Straps

It is a simple process that should be done carefully following the instructions. To start, unclip the straps from the back of your Diono car seat. Then, unhook the straps from the sides and gently pull the cover off. Sometimes, you may need a flathead screwdriver to push some clips to loosen the fabric.

Once the cover is removed, inspect the car seat for any damage before reinstalling it. Ensure no tears are in the fabric and all the straps are in working order. When you are finished inspecting, wipe down the car seat with a damp cloth to remove any dirt or residue.

It is essential to take your time and do this step carefully to ensure that the cover is correctly and safely installed. Following the steps above will give you the peace of mind that your Diono car seat cover is installed correctly and ready to protect your precious cargo.

Locate the Release Buttons

Press them on your Diono car seat to remove the cover. The Release Buttons can often be found at the top of the back of the car seat and on either side of the car seat. They are usually colored yellow or red for easy identification. Gently press the buttons, and the cover should start to come off. You may need a flathead screwdriver to push some clips to loosen the fabric.

Once you have the cover off, inspect the car seat for any damage before reinstalling it. Ensure no tears are in the fabric and all the straps are in working order. When you are finished inspecting, wipe down the car seat with a damp cloth to remove any dirt or residue. Make sure to take your time and be careful when you are installing the Diono car seat cover.

This will ensure that your car seat cover is correctly and safely installed. Following these instructions will give you peace of mind, knowing that your Diono car seat cover is installed correctly and ready to protect your precious cargo.

Pull the Release Buttons to Unhook the Cover

From the Diono car seat. Before you start, ensure the car seat is in the correct position and that all straps are securely fastened. Locate the release buttons on the side of the car seat and firmly press the buttons to unlock the cover.

Depending on the model, you may need a flathead screwdriver to push on some of the clips to loosen the fabric. Once the cover is released, you can carefully remove it from the car seat. Before reinstalling the cover, check the car seat for any damage. Look for tears in the fabric and ensure all straps are in working order. In addition, wipe down the car seat with a damp cloth to remove any dirt or residue.

You can carefully reinstall the Diono car seat cover when the car seat is clean and defects-free. Pay attention to the details and take your time so you don’t rush any of the steps. When you are done, you will be satisfied knowing that your Diono car seat cover is securely installed and ready to protect your precious cargo.

Lift the Cover Up and Out

Remove your Diono car seat cover. Depending on the model, you may need a flathead screwdriver to release some of the clips holding the cover in place. Once the cover is loose, you can carefully lift it away from the car seat.

Before reinstalling the cover, checking the car seat for any damage is essential. Look for tears in the fabric or broken straps that could interfere with the safety of your little one. In addition, take the time to wipe down the car seat with a damp cloth. This will help remove any dirt or residue that could stick to the car seat cover and cause wear and tear.

Once the car seat is clean and free of defects, you can carefully start reinstalling the cover. Take time with this part, ensuring the cover is installed correctly, and your precious cargo is safe and secure. When you are done, you will be satisfied knowing that your Diono car seat cover is securely installed and ready to protect your child.

Remove the Harness Straps

From the car seat. Unhook the straps and pull them away from the car seat. This will make it easier to remove the car seat cover. Look at the harness straps to ensure there are no signs of wear or damage. If there is any sign of damage, it is essential to replace the straps immediately for your child’s safety.

Once the straps are removed, you can proceed to unzip the car seat cover and take it off the car seat. Make sure to take your time and carefully remove the car seat cover. You could tear or damage the car seat cover if you are not careful.

Clean the Cover and Car Seat with a Mild Detergent Solution

Once the car seat cover and harness straps have been removed, it is time to clean them with a mild detergent solution. Do not use harsh detergents, as this could damage the fabric. Instead, use a mild detergent that is designed for delicate fabrics.

Fill a bucket or sink with warm water and the detergent, gently mix it. Put the car seat cover and harness straps into the solution and let them soak for a few minutes. Then, gently rub them with a soft brush or sponge to help loosen any dirt or grime that may be present.

Rinse the fabric thoroughly with clean water and let it air dry. Once dry, you can reinstall the car seat cover and straps. Knowing that your Diono car seat cover is securely installed and ready to protect your child should make you feel good when you are done.

Conclusion


Removing a Diono car seat cover is a relatively straightforward process, but it can be time-consuming and may require some patience. Start by loosening the straps on the back of the car seat and then remove the cover from the seat itself. To get the cover off the car seat completely, you may need to use a flathead screwdriver to pry off the cover. Once the cover is off, you can easily wash and dry it before reinstalling it on the car seat. You can quickly and easily remove your Diono car seat cover with the right tools and patience.

Filed Under: Car seats

How To Put Cosco Car Seat Back Together

January 23, 2024 by WSwakil12 Leave a Comment

As a parent, keeping up with all the necessary maintenance and repairs on your car seat can be a challenge. One of the most common repairs is putting your Cosco car seat back together after it’s been taken apart for cleaning or other purposes. To make the process easier, here’s a step-by-step guide on how to put your Cosco car seat back together. We’ll review the required tools and materials and the steps you need to take to assemble the car seat properly. With this guide, you can quickly put your Cosco car seat back together!

Read the Instructions Thoroughly

Before you begin assembling your Cosco car seat, it is important to read the instructions included in the package thoroughly. Putting the car seat back together may be more complicated than you originally thought. Ensure you know where each part of the car seat goes, and follow the directions carefully. If you have any questions, don’t be afraid to ask. Assembling a car seat is serious business; you don’t want to mess it up. Following the instructions will ensure your car seat is assembled correctly and securely.

Assemble the Car Seat Frame

As the first step of putting your Cosco car seat back together, you will need a Phillips screwdriver to complete this step. Start with the headrest and backrest, as these are the biggest parts. Secure the headrest and backrest together using the screws provided in the package. Next, attach the armrests and base of the chair. Make sure to tighten the screws securely.

Once the frame of the car seat is properly assembled, attach the frame to the base of the car seat. This is done with screws as well. Lastly, make sure all of the screws are tightened properly and securely. This will ensure your child’s car seat is safe and secure. Once the frame is assembled, you can proceed to the next step of putting the car seat back together.

Attach the Straps to the Seat

It is an important step in putting together a car seat correctly. Properly secured straps will ensure your child’s safety. To attach the straps:
First, carefully thread the straps through the slots in the seat.
Secure the straps by looping it around the frame of the seat.
Tighten the straps by pulling the strap carefully.
Ensure the straps are tight enough that the child cannot move around but not too tight to cause discomfort.

Once the straps are securely attached, you can attach the locking mechanisms. Secure the locking mechanisms to the sides of the car seat at the same time, making sure to keep them aligned. Lastly, secure the straps to the button at the back of the seat. Once secure, ensure the straps are tight enough for your child’s safety. These steps will ensure your car seat is correctly and safely set up.

Attach the Harness Clips to the Seat

By looping them around the frame of the seat and tightening them. Pull the strap carefully to ensure it is tight enough that the child cannot move around but not too tight that it causes discomfort. Then, attach the locking mechanisms to the sides of the car seat simultaneously and ensure they are aligned.

Lastly, secure the straps to the button at the back of the seat and check that the straps are tight enough for your child’s safety. This will ensure your car seat is correctly and safely set up. Additionally, read the instruction manual that came with your car seat to familiarize yourself with the model of the car seat you have and follow the instructions specific to that model.

You can contact your local car seat technician or child safety specialist for assistance if you have any specific questions.

Secure the Harness Straps

The most important step is ensuring the child is properly restrained in their car seat. To do this, attach the harness straps to the seat, loop them around the seat frame, and then tighten them until they are snug and secure.

Make sure to pull the strap carefully so it’s tight enough that the child won’t move around but not too tight that it causes any discomfort. After the straps are securely attached, attach the locking mechanisms to the sides of the car seat and make sure they are properly aligned. Lastly, secure the straps to the button at the back of the seat and check that the straps are tight enough for your child’s safety.

This will ensure that your car seat is correctly and safely set up. Don’t forget to read the instruction manual that came with your car seat and follow the instructions specific to that model. If you have any questions, contact your local car seat technician or child safety specialist for assistance.

Test the Car Seat Installation

Once the car seat is properly and securely installed, it is important to test it. Ensure that the seat is firmly set into the car and not wobbly or uneven. You should also check that the seatbelt provides a snug fit around the car seat and your child.

Additionally, it is important to check that the seat belt locks when you tug it. Lastly, test the LATCH straps to ensure they are secured to the car seat and anchor points and not loose. Make sure to put your child’s weight in the seat to ensure the straps are tight enough. If you have any questions, contact your local car seat technician or child safety specialist for assistance.

Testing the car seat installation is important in ensuring your car seat is installed correctly and safely.

Conclusion

Putting your Cosco car seat back together can be daunting, but with these tips and tricks, it doesn’t have to be. Take your time, read the instructions carefully, and make sure that you follow the instructions step-by-step. It may be helpful to take a few pictures throughout the process to refer back to them if you get stuck. Additionally, if you have any questions, don’t hesitate to contact the customer service team at Cosco for assistance. With patience and effort, you’ll have your car seat ready to go in no time.

Filed Under: Car seats

How To Loosen Straps On Britax Car Seat

January 23, 2024 by WSwakil12 Leave a Comment

As a parent, you want to ensure your child is safe and secure while riding in the car. The Britax car seat is famous for parents because of its many safety features. However, some of the straps on the Britax car seat can be difficult to adjust. In this post, we will walk you through how to loosen the straps on your Britax car seat so that you can get the perfect fit for your child. We will also discuss how to adjust the straps correctly for optimal safety.

Refer to your car seat manual for instructions

On how to loosen the straps on your Britax car seat. The manual will guide you through adjusting the straps correctly for optimal safety. Make sure to change the straps for an appropriate fit for your child. It would help if you also took note of the labels on the straps so you can adjust them properly.

When changing the straps, make sure that the straps are not too loose or too tight. It is essential to ensure that the straps are snug enough to securely put the child in the seat. Additionally, make sure that you check the straps regularly to ensure that they are correctly adjusted for your child’s safety. With proper adjustment and regular inspections, you can help keep your child safe in the car.

Locate the straps on the sides of the car seat

If your car seat has an adjustable head restraint, you should locate the straps located on the sides of the car seat. These straps are used to loosen or tighten the straps to fit your child correctly and securely in the seat. The straps should not be too loose or tight; they should be snug enough to keep your child safe and secure in the car.

Refer to your car seat manual for instructions on loosening or tightening the straps correctly. The manual will guide you through adjusting the straps to fit your child appropriately. It’s essential to ensure that the straps are adjusted correctly. Otherwise, your child may need to be adequately secured in the seat. Make sure to take note of the labels on the straps so you can adjust them properly.

Regularly checking the straps is essential to ensure they are still adjusted properly and securely around your child. With proper adjustment and regular inspections, you can help keep your child safe in the car.

Unhook the straps from the slots in the car seat

Adjust and secure your child in the seat. Most car seats come with adjustable straps that you can loosen or tighten. Adjusting these straps to fit your child correctly and securely in the chair is essential. The straps should not be too loose or tight; they should be snug enough to keep your child safe and secure in the car.

Refer to your car seat manual for instructions on loosening or tightening the straps correctly. The manual will guide you through adjusting the straps to fit your child appropriately. It’s essential to ensure that the straps are adjusted correctly.

Otherwise, your child may not be adequately secured in the seat. Make sure to take note of the labels on the straps so you can adjust them properly. Regularly checking the straps is essential to ensure they are still adjusted properly and securely around your child. With proper adjustment and regular inspections, you can help keep your child safe in the car.

Adjust the straps to the desired length

For a secure and comfortable fit for your child. When adjusting the straps, ensure they are not too loose or tight but snug enough to keep your child safe and secure in the car. Refer to your car seat manual for instructions on loosening and tightening the straps correctly.

It also helps to label the straps so you can adjust them properly. Regularly checking the straps is essential to ensure they are still adjusted correctly and securely around your child. With proper adjustment and regular inspections, you can help keep your child safe in the car.

To change the straps to the desired length, loosen the straps and then slide the straps on the harness up or down according to your child’s size. Ensure that the straps are snug around your child and that there is no slack. When you have finished adjusting the straps, double-check to ensure they are secure and properly fitted.

If the straps are too tight or loose, you may need to change them again. Following these steps will help ensure your child is safe and secure in their car seat.

Reattach the straps to the slots in the car seat

For a secure fit. Ensure you have the right strap for the right slot before attaching the straps. If the straps are too long, adjust the straps to fit your child’s size. Loosen the straps before you slide the straps up or down.

Once the straps are adjusted, double-check that they are secure and properly fitted. To ensure your child is safe and secure in their car seat, inspect the straps regularly and ensure they are adjusted correctly and securely around your child. Labeling the straps may also help you change them appropriately. Follow these steps to ensure your child is safe and secure in the car.

Test the straps to ensure the correct amount of tightness

To safely secure your child in the car seat. When adjusting the straps, loosen the straps by pulling the tension lock on the straps. Then, adjust the straps to the correct length, making sure that the straps are not too loose or tight. Label the straps so that you know which strap goes where.

Once the straps are adjusted, inspect the straps to make sure that there are no signs of damage and that the straps are not twisted or tangled. Last, double-check that the straps are securely fastened and that the straps are tight enough to hold your child in the car seat.

To ensure your child’s safety, regularly inspect the straps to ensure that they are securely fastened and adjusted to the correct size. Following these steps will help to keep your child secure in the car seat.

Conclusion

Loosening the straps on your Britax car seat is essential in ensuring that your child is safe and secure while riding in your vehicle. The straps should be reduced to ensure that your child is correctly fitted in the car seat and that the straps are not too tight or loose. To loosen the straps, pull the straps out and away from the car seat and then re-adjust the straps to the desired tightness. If necessary, refer to the car seat manual for further instructions. With the straps properly adjusted, you can ensure your child will be safe and secure every time they ride in your vehicle.

Filed Under: Car seats

How To Install Chicco Car Seat

January 21, 2024 by WSwakil12 Leave a Comment

Installing a Chicco car seat can be a tricky process. Knowing the right steps and tools is essential for a safe and secure installation. This guide will cover the steps to install a Chicco car seat correctly. We will cover the tools you need for the different types of Chicco car seats and provide detailed instructions for each step. By following our guide, you will be able to install your Chicco car seat with confidence. So, let’s get started!

Read the User Manual

The best way to learn how to install a Chicco car seat is to read the User Manual. The User Manual gives detailed instructions on installing the car seat and provides important warnings and safety tips. Read the entire manual to understand all the steps and safety information.
Also, if you have any questions, it is best to look in the manual or contact the manufacturer. If you cannot find the answer in the manual, you can always ask a professional for help. Most car seat manufacturers

provide customer service numbers or websites to answer questions.
Finally, always refer to the User Manual when installing the Chicco car seat. They provide the most accurate instructions for proper installation. Taking the time to read and understand the manual will ensure a safe and secure installation.

Familiarize Yourself with the Seat

It is a great way to keep your child safe while in the car. Before you install the car seat, make sure to read the User Manual that is included with the car seat. This manual provides instructions on properly installing the car seat, important warnings and safety tips. Knowing how to install the car seat correctly is essential to keep your child safe.

Always double-check all the parts and instructions for the car seat installation. It would help if you also looked for any additional advice and tips the manufacturer may have provided. Some car seats also come with a video tutorial, which can be helpful when installing the car seat. It is also helpful to ask a professional for assistance if you have difficulties installing the car seat. Lastly, always refer to the User Manual when installing the car seat, as it provides the most accurate information. Reading and understanding the manual will ensure a safe and secure installation for your car seat.

Secure the Seat in the Vehicle

It is a very important task for your children’s safety. To ensure a proper installation of the car seat, you should always refer to the User Manual of the car seat. The manual provides detailed instructions on how to install the car seat correctly. When installing the car seat, it is important to double-check the parts and instructions. It would help if you also looked for any additional advice and tips the manufacturer may have provided, as these can be very helpful.

Additionally, Someone with a video tutorial, which can be very useful when installing the car seat. Ask a professional for assistance if you have difficulties installing the car seat. Lastly, always read and understand the User Manual before installing the car seat, as this provides the most accurate information. Understanding how to install the car seat properly is essential for keeping your child safe.

Adjust the Harness System

To make sure your child is secure. Adjust the straps snugly around the child’s body and shoulders. The harness should be snug enough not to slip off or move around when your child is in the car seat. Adjust the harness height to fit your child’s growth. You should adjust the harness as your child grows to ensure it is tight enough for proper protection.

This is especially important for toddlers and older children as they can move and squirm in the car seat. To adjust the harness, look for a button or lever on the back of the seat. Ensure the shoulder straps are at or below the shoulder level for maximum protection.

Additionally, the chest clip should be at armpit level, and the crotch strap should be between the legs. Keep in mind your child’s comfort is also important. If the straps are too tight, your child may become restless due to discomfort. Check the User Manual for more tips and instructions on adjusting the harness system of your car seat.

Check for Proper Installation

As your child grows, checking that the harness is properly installed and adjusted is important. To ensure your child’s safety, the harness should be tight enough so they cannot move or squirm in the car seat. Look for a button or lever on the back of the seat to adjust the harness. The shoulder straps should be at or below the shoulder level for maximum protection.

The chest clip should be at armpit level, and the crotch strap should be between the legs. Ensure your child’s comfort also; it is not beneficial if the straps are too tight, as it could be uncomfortable and make your child restless. Consult the User Manual for more tips and instructions on adjusting the harness system of your car seat.

Test for Safety and Comfort

When using a car seat. When properly installed and adjusted, the harness system should keep your child secure and comfortable during the ride. Check the User Manual for more tips and instructions on adjusting the harness system of your car seat. Ensure the straps are not too tight, as this can be uncomfortable and make your child restless.

The shoulder straps should be at or below the shoulder level for maximum protection, and the chest clip should be at armpit level. The crotch strap should be between the legs. Always consult the User Manual for further information on how to adjust your car seat’s harness system properly. Additionally, check the car seat regularly to ensure it is properly installed and adjusted. This is vital in keeping your child safe and comfortable during car rides.

Conclusion

Installing a Chicco car seat is an important step in keeping your child safe while you are driving. It is important to ensure the seat is securely fastened and properly adjusted. If you have questions or need help with installation, please get in touch with Chicco’s customer service or a local certified car seat technician. With the right installation and maintenance, you can ensure your child is safe and secure in their Chicco car seat.

Filed Under: Car seats

How To Get Paint Out Of Car Seats

January 21, 2024 by WSwakil12 Leave a Comment

Whether you’ve spilled paint on your car seat while painting or accidentally gotten a glob of paint on your car seat while doing other projects, removing paint from car seats is no easy task. However, it is possible to get the paint out with the right approach and some elbow grease. This post will discuss the best way to get paint out of car seats and the products and tools needed to do the job. Let’s get started!

Identify the Type of Paint

Before attempting to remove paint from your car seat, you must identify the type of paint you are dealing with. There are many different types of paint, each requiring a different removal approach. Knowing what kind of paint you are dealing with is the first step to properly and safely removing it from your car seat. To identify the type of paint, look for a few key characteristics.

If the paint is water-soluble, it will be easy to remove with a mild detergent and some water. If the paint is oil-based, you must use a solvent to dissolve the paint. Finally, if the paint is latex or enamel-based, you can use a combination of solvents and detergents to loosen and remove the paint.

Prepare the Area

Once you have identified the type of paint, the next step is to prepare the area where you will be removing the paint. Before beginning, make sure to put on a pair of rubber gloves and safety goggles to protect yourself. Next, you must cover the area with a drop cloth or newspaper to prevent spills from damaging your car seat. Lastly, using solvents to remove the paint, you must ensure the area is well-ventilated. After the area is prepped, you can begin the paint removal process.

Test Mild Cleaning Solutions

To identify the type of paint and prepare the area before beginning the paint removal process. To determine the type of paint, look for a few key characteristics. If the paint is water-soluble, it will be easy to remove with a mild detergent and some water. If the paint is oil-based, you must use a solvent to dissolve the paint.

Finally, if the paint is latex or enamel-based, you can use a combination of solvents and detergents to loosen and remove the paint. Once you have identified the type of paint, the next step is to prepare the area where you will be removing the paint. Before beginning, make sure to put on a pair of rubber gloves and safety goggles to protect yourself. Next, you must cover the area with a drop cloth or newspaper to prevent spills from damaging your car seat.

Lastly, using solvents to remove the paint, you must ensure the area is well-ventilated. Once the area is prepped, you can begin the paint removal process. Make sure to test mild cleaning solutions on a small paint area first. This will help you determine which products will work best and what precautions to take to avoid damage to the car seat. This will also help you decide which products and techniques will work best for the paint you are dealing with. If you use the wrong product or strategy, you may damage the seat or worsen the problem. Follow the instructions carefully, and be sure always to practice safety first.

Use a Solvent-Based Cleaner

When removing paint from car seats. Solvents are effective for removing paint and other difficult stains. Start by removing any excess dirt or dust from the surface. Then, use a dry cloth to remove any remaining dirt. Then, cover the area with a drop cloth or newspaper to prevent spills from damaging your car seat. Once the area is prepped, you can begin the paint removal process.

Make sure to test mild cleaning solutions on a small paint area first. This will help you determine which products and techniques will work best for the paint you are dealing with. If you use the wrong product or strategy, you may damage the seat or worsen the problem. Wear protective gear like gloves, goggles, and a face mask to protect yourself from the fumes.

And be sure to work in a well-ventilated area. To make the process easier, use a bristle brush to help evenly work the solvent into the stain. This will help break down the paint and make it easier to remove. Follow the instructions carefully, and be sure always to practice safety first.

Use a Paint Scraper

To help remove stubborn and dried paint from a variety of surfaces. Before you begin, you must ensure the surface is clean and free of dust or dirt. This will ensure the scraper can get underneath the paint and work effectively. Additionally, test mild cleaning solutions on a small paint area first. This will help you determine which products and techniques will work best for the paint you are dealing with.

If you use the wrong product or strategy, you may damage the seat or worsen the problem. Wear protective gear like gloves, goggles, and a face mask to protect yourself from the fumes. And be sure to work in a well-ventilated area. To make the process easier, use a bristle brush to help evenly work the solvent into the stain. This will help break down the paint and make it easier to remove.

After the stain has been performed, use a paint scraper to scrape away the paint carefully. Be sure to use the scraper gently and with care. If you need help using the scraper, consult the user manual for further instructions. Follow the instructions carefully, and be sure always to practice safety first.

Apply a Stain Remover

To remove any paint or other tough stains. Wear protective gear, including gloves, goggles, and a face mask, to protect yourself from the fumes and debris. It is also essential to ensure you work in a well-ventilated area before beginning the process. Before you start, have all the necessary supplies, such as a brush, a scraper, and a solvent. Start using a bristle brush to brush the solvent into the stain. This will help break down the paint and make removing it easier.

After the process is completed, use a paint scraper to scrape away the paint carefully. Be sure to use the scraper gently and with care. If you need help using the scraper, consult the user manual for further instructions. Follow the instructions carefully, and be sure always to practice safety first. Once the paint has been completely removed, cleaning the area thoroughly with a damp cloth is essential to remove all the solvent residue. After cleaning the area, apply a sealant to protect the surface from future damage.

Rinse and Dry the Area

After removing the paint, it is essential to rinse and dry the area to remove any remaining solvent residue. This will help to ensure that the paint will not return. To flush the area:
Use a garden hose or a pressure washer.
Use a gentle stream of water to ensure you do not damage the surface.
After the area is rinsed, use a soft cloth to dry the area. Once the area is arid, it is essential to apply a sealant.
This will help to protect the surface from future damage and ensure that the paint will not return. If you are still determining what kind of sealant to use, consult a professional for further guidance. Always practice safety first and follow the instructions carefully when applying the adhesive.

Conclusion

Getting paint out of car seats can be difficult and time-consuming, but it is possible. Act quickly and use the proper techniques to avoid further damage, starting by scraping off as much of the paint as possible and then using a combination of solvents, vacuuming, and scrubbing to remove the rest. If you still need help, you can also hire a professional to do the job. Always take extra care when working with car seats, as they are delicate and easily damaged.

Filed Under: Car seats

How To Get Graco Car Seat Out Of Base

January 21, 2024 by WSwakil12 Leave a Comment

If you’re having trouble getting your Graco car seat out of the base, you’re not alone. Many parents find themselves struggling to remove the seat from the base. Fortunately, there are some simple steps you can take to make the process easier. In this post, we’ll cover the basics of how to get a Graco car seat out of the base as quickly and easily as possible. We’ll also discuss the importance of following the car seat manufacturer’s instructions and safety precautions. This will make the process less stressful and ensure your child’s safety.

Identify the Model of Your Graco Car Seat

If you would like to safely remove your Graco car seat from the base, it’s important to determine your seat’s model before you begin. This will help you follow the installation instructions, including the necessary steps for safely removing the seat. To find your model, check the label on the side of the seat. You should find a model number and a date of manufacture.

If you have a manual, it should also give you the model number. Otherwise, you can do a quick search online. Once you know your seat’s model, you can follow the manufacturer’s instructions to safely and easily get your Graco car seat out of the base. Read the instructions thoroughly before you begin to ensure a smooth and successful removal.

Remove the Retainer Clip

When removing your Graco car seat from the base, one of the most important steps is to remove the retainer clip. This clip is designed to keep the car seat securely attached to the base. Before you begin the process, read the manufacturer’s instructions for removing the clip correctly.

It’s also important to ensure the clip is fully secured before removing it. To begin, unclip the retainer clip from the car seat base. You must pull and wiggle the clip gently as you unclip it. Make sure the clip is not damaged during this process.

Once the clip is removed, you can lift the car seat from the base. Hold it securely as you remove it to ensure your child’s safety. Finally, if you need to store the clip, keep it somewhere safe and away from children.

Push the release button

On the car seat base, begin the process of removing it. Please read the manufacturer’s instructions carefully to ensure you do it correctly and without damaging the clip. Start by unclipping the retainer clip from the car seat base.

This may take some wiggling and gentle pulling to get it to unclip. Once the clip is removed, you can lift the car seat from its base. It’s important to hold the car seat securely as you do this to ensure your child’s safety. Finally, if the clip needs to be stored while not attached to a base, keep it safe and away from children.

Pull up on the handle to unlock the car seat

That is attached to the car seat base. Ensure your hand is firmly placed on the handle and the car seat and base are secure. You may need gentle force to unclip the seat from the base. Once the car seat is unclipped, hold it securely and lift it away from the base.

Follow the manufacturer’s instructions before attempting to unlock the car seat. It is important to ensure that your child’s safety is not compromised when removing the car seat. After the car seat is unlocked, you should be able to lift it off the base. If the clip needs to be stored, keep it away from children. Taking the proper steps to unlock the car seat will ensure your child is safe and secure while travelling.

Lift the car seat out of the base

Safely and securely. Before attempting to unclip the car seat from its base:
Ensure that your hand is firmly placed on the handle and that the car seat and base are secure. You may need gentle force to unclip the seat from the base.
Once the car seat is unclipped, hold it securely and lift it away from the base.
Follow the manufacturer’s instructions before attempting to unlock the car seat.
It is important to ensure that your child’s safety is not compromised when removing the car seat. After the car seat is unlocked, you should be able to lift it off the base. If the clip needs to be stored, make sure it is kept in a safe place, away from young children. Taking the proper steps to unlock the car seat is essential to ensure your child is safe and secure while travelling.

Secure the car seat into the car

By unclipping it from the base and holding it firmly. Before attempting to remove the car seat from its base, ensure that your hand is firmly placed on the handle and that the car seat and base are secure. It may require a gentle force to unclip the car seat from the base.

Once the car seat is successfully unclipped, hold it tightly and carefully lift it away from the base. Be sure to follow the manufacturer’s instructions before attempting to unlock the car seat, as it is essential to ensure your child’s safety while travelling.

Once the car seat is unlocked, it should be able to be lifted off the base. If the clip needs to be stored, make sure it is kept in a safe place, away from young children and other family members. Taking the proper steps to unlock the car seat is essential to keep your child safe and secure when travelling.

Conclusion

Removing your Graco car seat from the base can be daunting, but with the right instructions and a few tools, it can be done quickly and easily. Take your time and ensure you have all the necessary tools before you begin. Once you’ve successfully removed the car seat from the base, you can install it in your vehicle. By following these simple steps, you can have your Graco car seat installed and ready to go in no time!

Filed Under: Car seats

How To Get Chocolate Out Of Car Seat

January 18, 2024 by WSwakil12 Leave a Comment

We’ve all been there. You’re rushing, running late, and grabbing a snack in the car. Unfortunately, it doesn’t go as planned, and you end up with chocolate all over your car seat. Don’t worry; we’ve got you covered. Here are some tips on getting chocolate out of the car seat to keep your car looking and smelling its best. From quick solutions to deep cleaning, this guide will help remove chocolate stains from car seats and keep your car looking and smelling great.

Scrape off as much chocolate as possible

From the car seat with a dull knife or spoon. This will help lift off most of the chocolate from the fabric. Be sure not to press too hard on the fabric, or you could damage it. You can also use a vacuum cleaner to help remove any remaining chocolate pieces. After you have scraped off as much chocolate as possible, it is time to tackle the stains. Use a damp cloth to blot the stained area.

This will help to soak up any remaining chocolate and help to lift the stain. You can also use a mixture of dish soap and warm water to help lift the stain further. Pour the mixture onto the stained area and let it sit for 10-15 minutes. After this, use a damp cloth to blot the area. Finally, you can use a dry cloth to help absorb any remaining liquid.

Vacuum the car seat

Please remove any remaining chocolate pieces from it. Make sure to take special care along the crevices and corners of the car seat. Vacuuming is a good way to eliminate any remaining chocolate particles that may have become embedded in the fabric. After vacuuming the seat, blot the stained area with a damp cloth. This will help to soak up any remaining chocolate and help to lift the stain.

Try a mix of dish soap and warm water to help lift the stain further. Pour the mixture onto the stained area and let it sit for 10-15 minutes. After this, use a damp cloth to blot the area and a dry cloth to absorb any remaining liquid. Repeat this process until the stain is completely gone. If the stain remains, consider taking your car to a professional cleaner with experience with fabric car seats.

Blot the stain with a wet cloth

As soon as possible after it occurs. This will help to soak up any remaining chocolate and help to lift the stain. Blotting should be done with a damp cloth. Avoid rubbing the stain, as this may cause it to spread and become more difficult to remove. After blotting the stain, try a mix of dish soap and warm water to help lift the stain further.

Pour the mixture onto the stained area and let it sit for 10-15 minutes. After this, use a damp cloth to blot the area and a dry cloth to absorb any remaining liquid. You may need to repeat this process several times to remove the stain. If the stain remains, consider taking your car to a professional cleaner with experience with fabric car seats.

Apply a stain remover

Product to the area of the fabric affected by chocolate. Please read the directions on the product’s label and follow them carefully. This will ensure that the product is effective and will not damage the fabric. Use a cloth dampened with the solution to blot at the stained area gently. This will help to draw out the remaining chocolate and any residue.

Avoid rubbing or scrubbing the area when blotting, as this may spread the stain and make it harder to remove. If the stain persists, mix dish soap with warm water and rub the area gently with the mixture. Let the solution sit for 10-15 minutes, and then use a damp cloth in the mixture to blot at the stained area. Then, use a dry cloth to absorb any excess liquid. Repeat this process until the stain is removed. If the stain persists, take your car to a professional cleaner with experience in fabric car seats.

Let the solution sit for several minutes

Before you work on the stain, this will give the solution time to loosen the residue and draw the chocolate out of the fabric. You can gently use a cloth dampened with the solution to blot at the stained area. This will help to draw out the remaining chocolate and any residue. Avoid rubbing or scrubbing the area when blotting, as this may spread the stain and make it harder to remove. If the stain persists, mix dish soap with warm water and rub the area gently with the mixture.

Let the solution sit for 10-15 minutes, and then use a damp cloth in the mixture to blot at the stained area. Then, use a dry cloth to absorb any excess liquid. Repeat this process until the stain is removed. If the stain persists, take your car to a professional cleaner with experience in fabric car seats. You can easily remove chocolate stains from your car seats with a few simple steps and patience. Allowing the solution to sit on the stain for several minutes is a key step in eliminating the chocolate residue.

Blot the stain with a damp cloth

To help absorb the liquid and lift the stain. Do not rub or scrub the area, as this may spread the stain and make it harder to remove. If the stain persists, make a dish soap solution and warm water. Then, gently rub the stained area with a cloth dampened in the mixture. Allow the solution to sit for 10-15 minutes before using a dry cloth to absorb any excess liquid.

Repeat this process until the stain is removed. If the stain remains, it is best to take the car to a professional cleaner, as they can quickly and safely remove the stain without damaging the seat’s fabric. You can easily remove chocolate stains from your car seats with a few simple steps and patience. Allowing the solution to sit on the stain for several minutes is a key step in eliminating the chocolate residue.

Use a steam cleaner

For an easy way to remove chocolate stains from your car seat. Steam cleaners use hot water and pressure to remove surface dirt and stains. Start by testing the steam cleaner on an inconspicuous car seat area to ensure it won’t damage the fabric. Once you know it is safe, please turn on the steam cleaner and slowly move it across the affected area.

The steam cleaner will force the chocolate stain out of the fabric, making it much easier to clean. If the stain requires additional attention, you may need to re-apply the steam cleaner. Before using the steam cleaner again, ensure the area is completely dry. This will help prevent any further damage. Use caution when using the steam cleaner, and make sure that you read the instructions carefully before you start.

Vacuum the area again

After using the steam cleaner to remove all the dirt, dust, and other particles, you should use a vacuum specifically designed for use on car seats, as regular vacuums may damage the fabric. Start by gently going over the affected area with the vacuum. You may need to go over the same area multiple times to ensure that all of the dirt and debris have been removed.

Make sure you use slow motion when vacuuming, as this will help prevent any further damage to the fabric. When you are finished vacuuming, you should thoroughly inspect the area to ensure all the dirt and debris have been removed. If you notice that there is still debris on the seat, you should repeat the vacuuming process until all of the particles have been removed. Vacuuming the area again after using the steam cleaner is important to ensure your car seat remains clean and in good condition.

Conclusion

Getting chocolate out of a car seat can be challenging. However, with the right tools and knowledge, the task can be done quickly and efficiently. Clean the area with a damp cloth and a mild soap solution. Then, use a vacuum cleaner to remove any remaining chocolate. Use a stain remover or dry cleaning solvent if there are stubborn stains. Finally, for any remaining stains, use a combination of baking soda and water. With these steps, you can have your car seat looking as good as new.

Filed Under: Car seats

How To Disconnect Car Seat From Base

January 18, 2024 by WSwakil12 Leave a Comment

Installing a car seat can be daunting, but it is essential for keeping your little one safe when travelling. However, disconnecting from the base can be a bit tricky, especially for those new to the process. This post will a step-by-step guide to help you safely and securely remove your car seat from its base. We’ll provide some tips and tricks to make the process easier to understand and follow.

Read the Manufacturer’s actions

You must read the instructions before disconnecting the car seat from its base. Ensure you understand the steps and warnings for removing the car seat from its base. Most car seat models have a user manual outlining the process and providing safety tips. Make sure to follow the instructions closely, as failure to do so could result in injury or harm to your child.

Additionally, it is important to note that some models require specific tools or parts to disconnect the seat properly. Read the instructions carefully and have all the necessary items on hand before beginning. After you have read and understood the instructions, you are ready to disconnect your car seat.

Locate the Release Lever or Button

Now that you have read the instructions, it is time to locate the release lever or button. This will be located either on the side or bottom of the car seat. It may also be referred to as the quick-release button or lever. The release lever or button is typically accessible without removing any padding. If you cannot locate the release lever or button, consult the user manual for instructions on its location. Once you have found the release lever or button, you may proceed with the removal.

Press the Release Lever or Button: After locating the release lever or button, it is time to press the lever or button to release the car seat from the base. Press the lever or button firmly, but do not use excessive force. If the release lever or button does not move freely, do not attempt to force it, as doing so could cause damage to the car seat or injure your child. Instead, consult the user manual for troubleshooting instructions or contact the manufacturer for assistance.

Push or Pull the Lever or Button

Understanding the difference between pushing or pulling the lever or button to release the car seat is important. Depending on the car seat model, a release lever or button may be on the side or top of the car seat. It may also be referred to as the quick-release button or lever. The release lever or button is typically accessible without removing any padding. If you cannot locate the release lever or button, consult the user manual for instructions on its location. Once you have found the release lever or button, you may proceed with the removal.

Press the Release Lever or Button: After locating the release lever or button, it is time to press the lever or button to release the car seat from the base. Press the lever or button firmly, but do not use excessive force. If the release lever or button does not move freely, do not attempt to force it, as doing so could cause damage to the car seat or injure your child. Instead, consult the user manual for troubleshooting instructions or contact the manufacturer for assistance.

Pull the Lever or Button: For car seats with a release lever or button on the side, you may be required to pull the lever or button to release the car seat. Many car seats use a push-pull system, meaning you must combine pushing and pulling to release the car seat. Consult the user manual for instructions on properly releasing the car seat.
It is important to follow the instructions to ensure safe usage and avoid accidents or injuries. Once the car seat is released from the base, you may now remove it from the car.

Remove the Car Seat from the Base

To remove the car seat from the base, you must first unlock or release the car seat from the base. Many car seats have a release lever or button on the side of the car seat. Press the lever or button firmly, but do not use excessive force. If the release lever or button does not move freely, do not attempt to force it, as doing so could cause damage to the car seat or injure your child.

Instead, consult the user manual for troubleshooting instructions or contact the manufacturer for assistance. Pull the Lever or Button: For car seats with a release lever or button on the side, you may be required to pull the lever or button to release the car seat. Many car seats use a push-pull system, meaning you must combine pushing and pulling to release the car seat.

Consult the user manual for instructions on properly releasing the car seat. It is important to follow the instructions to ensure safe usage and avoid accidents or injuries. Once the car seat is released from the base, you may now remove it from the car. Make sure to lift the car seat out of the base and set it aside, as the base may still be locked and could cause a safety hazard.

Secure the Car Seat in the Vehicle

It is important to ensure your car seat is securely fastened in the vehicle before each trip. To ensure a safe and secure fit, it is important to follow the manufacturers and ensure the car seat is tightly fastened:
Make sure the car seat is in the right position. If the car seat has adjustable straps or levers, ensure these are aligned correctly.
Make sure the car seat is levelled in the vehicle. If the car seat has adjustable leg extensions, make sure the extensions are adjusted to the right height.

Check that the release lever or button is free and functioning correctly.
If the release lever or button does not move freely, do not attempt to force it, as doing so could cause damage to the car seat or injure your child. Instead, consult the user manual for troubleshooting instructions or contact the manufacturer for assistance. Pull the Lever or Button: For car seats with a release lever or button on the side, you may be required to pull the lever or button to release the car seat. Many car seats use a push-pull system, meaning you must combine pushing and pulling to release the car seat.

Consult the user manual for instructions on properly releasing the car seat. It is important to follow the instructions to ensure safe usage and avoid accidents or injuries. Once the car seat is released from the base, you may now remove it from the car. Make sure to lift the car seat out of the base and set it aside, as the base may still be locked and could cause a safety hazard. Finally, securely fasten the car seat into place. Check that the straps or locking mechanisms are tight and that the car seat is properly secured.

Check the Installation Instructions for the Vehicle

Before installing a car seat, consult the user manual to ensure all safety instructions are followed correctly. Each car seat is different, so it is essential to read the instructions thoroughly. Start by checking to see if the car seat is compatible with your vehicle and follow the installation instructions accordingly. Some car seats require seatbelts, while others have a LATCH system allowing simpler installation.

If you use a seatbelt-based system, lock the seatbelt and ensure it is tight. If your car has a LATCH system, you should follow the instructions for that system as well. Finally, read the user manual for specific installation instructions for your car seat. Understanding exactly how the car seat should be installed and operated is key to keeping your child safe in the car.

Conclusion

Disconnecting a car seat from its base can be daunting for some, but with a few simple steps, you can easily remove your car seat and be on your way. Before you begin:
Read the instructions and know how to secure the car seat properly.
Use the correct tools, and do not force the car seat to disconnect.
If you are still having trouble, contact the manufacturer for additional help.
With the right knowledge and tools, you can quickly and easily disconnect your car seat from its base.

Filed Under: Car seats

  • « Go to Previous Page
  • Page 1
  • Page 2
  • Page 3
  • Page 4
  • Page 5
  • Go to Next Page »

Primary Sidebar

Recent Posts

  • How To Travel With Car Seat Base
  • How To Take Car Seat Off Evenflo Stroller
  • How To Remove Graco Snugride Car Seat From Base
  • Why Do Cars Feel Faster In The Passenger Seat
  • How To Store Infant Car Seat

Recent Comments

No comments to show.

Copyright © 2025 · parentsphere.net All rights reserved